

From Frays to Flair: Mastering Patch Stitching With Pro Precautions
2026-01-27
Table of Contents
Stitching a patch is a practical skill for repairing garments, personalizing accessories, or reinforcing fabric.
I. Pre-Stitching Preparation: Lay the Foundation for Success
Adequate preparation prevents common issues like misalignment, fraying, and poor adhesion. Every step from material selection to positioning requires attention to detail.
A. Material & Tool Selection Precautions
Matching materials and choosing the right tools are critical for compatibility and durability. Using mismatched components can lead to premature wear or fabric damage.
| Item | Selection Criteria | Precautions |
|---|---|---|
| Patch Material | Fabric, leather, vinyl, or embroidered patches; match weight to base garment | Avoid vinyl patches with high heat sensitivity if using an iron; test embroidery thread fastness |
| Thread | Polyester (fray-resistant, durable) or cotton (natural look); color-matched to patch/garment | Do not use low-tensile thread for heavy fabrics; avoid neon threads for long-term wear (fades easily) |
| Needle | Sharp needles: Size 70/10 (delicate fabrics), 80/12 (medium fabrics), 90/14 (heavy fabrics/leather) | Replace dull needles to prevent fabric snags; use leather needles for vinyl/leather patches |
| Auxiliary Tools | Disappearing ink pens, rust-proof pins, double-sided tape, fabric scissors, iron, interfacing | Avoid permanent markers (stain fabric); use heat-resistant tape for heat-activated patches |
B. Garment & Patch Pre-Treatment Rules
Pre-treating removes impurities and reduces shrinkage, ensuring the patch stays in place after washing.
| Item | Pre-Treatment Steps | Key Precautions |
|---|---|---|
| Garment | 1. Wash in cold water with mild detergent; 2. Air dry or tumble dry low; 3. Iron to remove wrinkles; 4. Add interfacing to thin fabrics | Do not skip washing—unwashed fabric shrinks post-stitching; iron on low heat for delicate fabrics (silk, lace) |
| Patch | 1. Wipe with a damp cloth (fabric patches); 2. Let air dry; 3. Trim loose threads (if needed) | Do not soak embroidered patches (damages threads); avoid pre-cutting edges (increases fraying risk) |
C. Precise Positioning Guidelines
Misalignment ruins the aesthetic; take time to mark and secure the patch correctly.
Use a disappearing ink pen to draw the patch’s outline on the garment. This ensures you can adjust before stitching without permanent marks.
Secure the patch with rust-proof pins (placed along the edges, 1–2 cm apart) or double-sided tape. Avoid stretching the garment while positioning—stretching causes puckering after stitching.
For symmetrical designs (e.g., patches on jackets, bags), use a ruler or measuring tape to check distances from hems, seams, or other features. Mark center points on both the patch and garment for alignment.
| Garment Type | Ideal Position | Positioning Tip |
|---|---|---|
| Jacket/Coat | Upper chest (left/right), sleeve, or back | Align with shoulder seam for balance |
| Jeans | Knees, back pockets, or thigh | Avoid stitching over seam allowances (bulk) |
| Backpack/Bag | Front panel, shoulder strap, or side | Test positioning by wearing/carrying the item |
II. Stitching Process: Core Precautions for Durability & Aesthetics
The stitching method (hand or machine) depends on skill level, fabric type, and desired finish. Both require careful tension control and edge focus.
A. Hand-Stitching Best Practices
Hand stitching is ideal for small patches, delicate fabrics, or decorative details. Prioritize strength and neatness.
| Stitch Type | How to Execute | Precautions |
|---|---|---|
| Backstitch (Most Durable) | 1. Make a small stitch forward; 2. Stitch back over half the length; 3. Repeat, keeping stitches 2–3 mm apart | Maintain consistent stitch length; avoid overlapping too much (bulk) |
| Whipstitch (Edge Coverage) | Wrap thread around the patch edge, inserting the needle through the garment and patch alternately | Keep stitches tight but not constricting; 3–5 mm from the edge |
| Running Stitch (Decorative Only) | Stitch forward in small, even lengths without backtracking | Do not use for high-wear areas (weak hold) |
Control thread tension: Too tight pulls the fabric, causing puckering; too loose leads to a floppy patch. Keep tension moderate—thread should lie flat against the fabric.
Start and end with secure knots. Thread the needle with a 45–60 cm length (longer thread tangles easily). Tie a double knot at the end, inserting the needle from the garment’s back to hide the knot.
Avoid piercing decorative elements (beads, sequins, or embroidery) on the patch. Stitch around them or use fabric glue to secure those areas.
B. Machine-Stitching Critical Notes
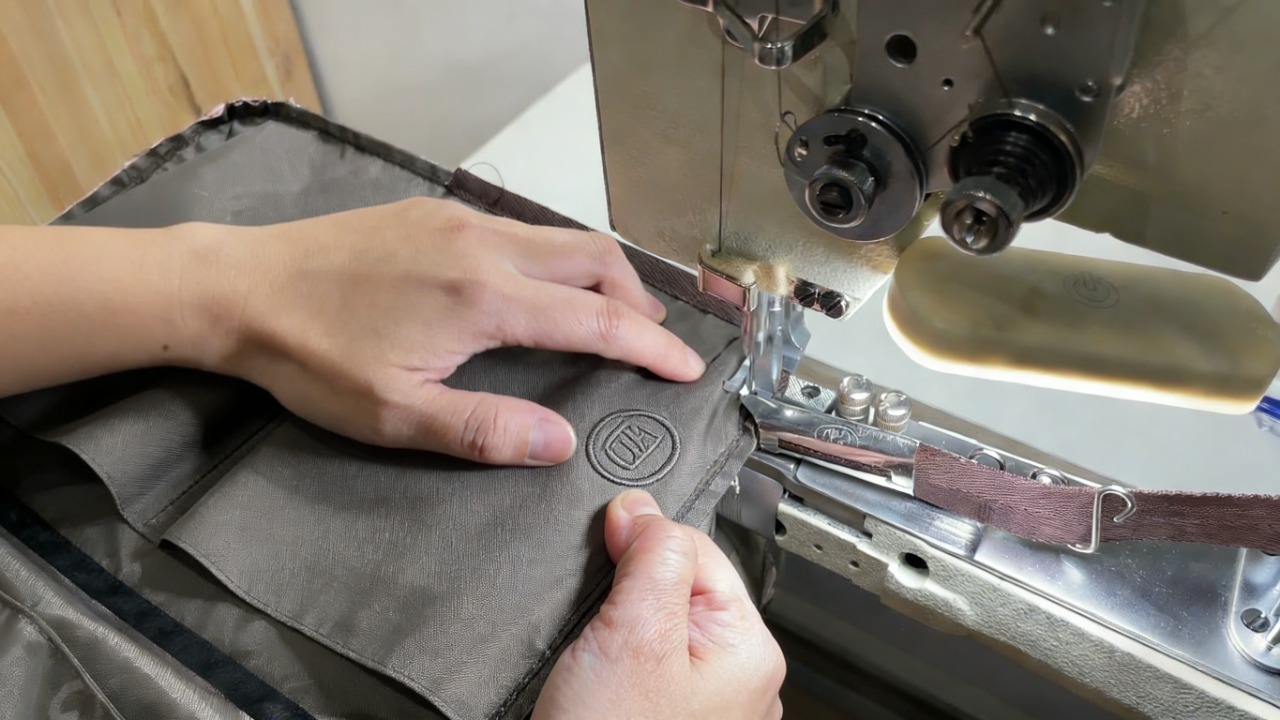
Machine stitching is faster and more consistent for large patches or heavy fabrics. Proper setup prevents fabric shifting and uneven stitches.
| Setup Item | Recommended Settings | Precautions |
|---|---|---|
| Presser Foot | Universal foot (general use) or walking foot (prevent shifting) | Avoid zipper feet—they limit edge access |
| Stitch Length | 2–3 mm (medium fabrics); 1.5–2 mm (heavy fabrics/leather) | Longer stitches weaken hold; shorter stitches damage delicate fabrics |
| Thread Tension | 3–4 (standard); adjust to 2–3 for delicate fabrics | Test on scrap fabric first—tension varies by machine |
Stitch along the patch edge first, keeping 3–5 mm from the border. For extra durability, sew a second row 1–2 mm inside the first row.
Do not stitch through the same hole repeatedly—this weakens the fabric and causes tearing. Guide the garment gently; avoid pulling or pushing (lets the machine feed fabric evenly).
For heat-activated patches: Press with an iron first (follow patch instructions) to secure adhesion. Stitch only after the patch is fully bonded—stitching before pressing disrupts the adhesive.
III. Post-Stitching Finishing: Avoid Common Mistakes
Finishing steps ensure the patch is comfortable, neat, and long-lasting. Neglecting these leads to loose threads, bulk, or damage during washing.
A. Trimming & Securing
Trim excess threads carefully to avoid fabric damage. Use small, sharp fabric scissors for precision.
Cut thread ends close to the fabric (1–2 mm) on both the garment’s front and back. For thick patches, trim the backing fabric (if removable) to reduce bulk—this improves comfort when wearing the garment.
Secure loose threads with a small drop of fray check (test on a hidden area first to avoid discoloration). Do not apply too much—excess product stiffens the fabric.
B. Final Inspection & Reinforcement
Inspect the patch thoroughly before finishing. Check all edges for loose stitches or gaps.
Reinforce weak spots (e.g., corners, curved edges) with extra backstitches. Corners are prone to lifting—sew a small square or X at each corner for added strength.
Press the stitched area gently with a low-heat iron. Place a thin cloth between the iron and patch to prevent melting (vinyl/leather patches) or damaging embroidery threads.
C. Garment Care Instructions
Proper care preserves the patch and garment. Follow these guidelines to avoid damage.
| Care Step | Instructions | Precautions |
|---|---|---|
| Washing | Wash inside out in cold water; use mild detergent | Avoid bleach, harsh detergents, or hot water (fades threads, weakens adhesive) |
| Drying | Air dry or tumble dry on low heat | Do not high-heat dry (melts vinyl, shrinks fabric unevenly) |
| Ironing | Iron inside out on low heat; use a cloth barrier | Do not iron directly on the patch (damages decorative elements) |
IV. Troubleshooting: Fix Common Stitching Issues
Even with precautions, issues may arise. Address problems promptly to save the garment and patch.
| Issue | Causes | Solutions |
|---|---|---|
| Puckered Fabric | Too tight thread tension; stretched garment during positioning; dull needle | Loosen tension; reposition without stretching; replace needle; gently press to smooth fabric |
| Loose Patch Edges | Stitches too far from edge; weak thread; insufficient adhesive (heat-activated patches) | Add a second row of stitching; use stronger thread; re-press heat-activated patches |
| Frayed Patch Threads | Unpretreated patch; sharp edges; harsh washing | Apply fray check to edges; trim loose threads; wash gently |
| Stitch Skipping (Machine) | Dull needle; incorrect needle size; fabric shifting | Replace needle; match needle to fabric; use a walking foot |
| Thread Breaking | Too tight tension; old thread; needle eye too small | Loosen tension; use new thread; switch to a larger needle |
V. Additional Tips for Specific Patch Types
Different patch materials require tailored approaches. Adjust techniques based on the patch type.
A. Embroidered Patches
Avoid stitching through embroidery threads. Stitch along the patch’s border, not the decorative area. Use a finer needle to prevent damaging the patch’s design.
B. Vinyl/Leather Patches
Use leather needles and polyester thread (resists stretching). Do not iron directly on vinyl—use a cloth barrier and low heat. Avoid fray check (damages vinyl).
C. Heat-Activated Patches
Follow the patch’s heat and time instructions (usually 10–15 seconds at medium heat). Allow the patch to cool completely before stitching. Do not wash for 24 hours after pressing.
By following these precautions and steps, you can achieve a professional, durable patch application. Whether repairing a favorite garment or adding a personal touch, attention to detail ensures the result lasts for years.


PEPHAWK is proud to highlight our integrated one-stop service—seamlessly combining professional design, R&D, and manufacturing capabilities to deliver cohesive, end-to-end solutions for our valued clients.
Our core product range covers a diverse selection of high-quality accessories and silicone-based items, including:
- Garment Accessories: Silicone Labels, Micro Fiber Labels, TPU Labels, Leather Labels
- Electronic & Lifestyle Gadgets: Silicone Mobile Phone Skins, Silicone MP3 Skins, Silicone Chaplets, Silicone Bracelets
Beyond our core offerings, we also connect clients with complementary products through our trusted affiliated companies, ensuring all your needs are met under one partnership.
What sets us apart is our specialized expertise in key manufacturing processes: Silk Screen Printing, High-Frequency Welding, Sublimation Printing, Seamless Fabric Processing, and Laser Cutting. These capabilities allow us to serve a wide array of industries—from garments, shoes, caps, and gloves to electronic devices, bags, and sporting equipment—with products that blend durability, functionality, and aesthetic appeal.
At PEPHAWK, customer satisfaction is our top priority. We’re committed to providing responsive, thorough support, and guarantee a same-day response to all inquiries—no exceptions. You can rely on us for consistent quality, reliable delivery, and a partnership that’s as efficient as it is trustworthy.
Whether you’re looking for custom apparel labels, protective silicone skins, or tailored manufacturing solutions, PEPHAWK has the expertise and flexibility to bring your vision to life.
A Comprehensive Guide to Purchasing High-Quality Sewn Patches
The Iconic Brand Patches Shaping Shirt Style




SEND MESSAGE