

How to Ensure Patches Stay Secure on Backpacks: Heat Transfer vs. Sewing Methods
2025-12-25
Table of Contents
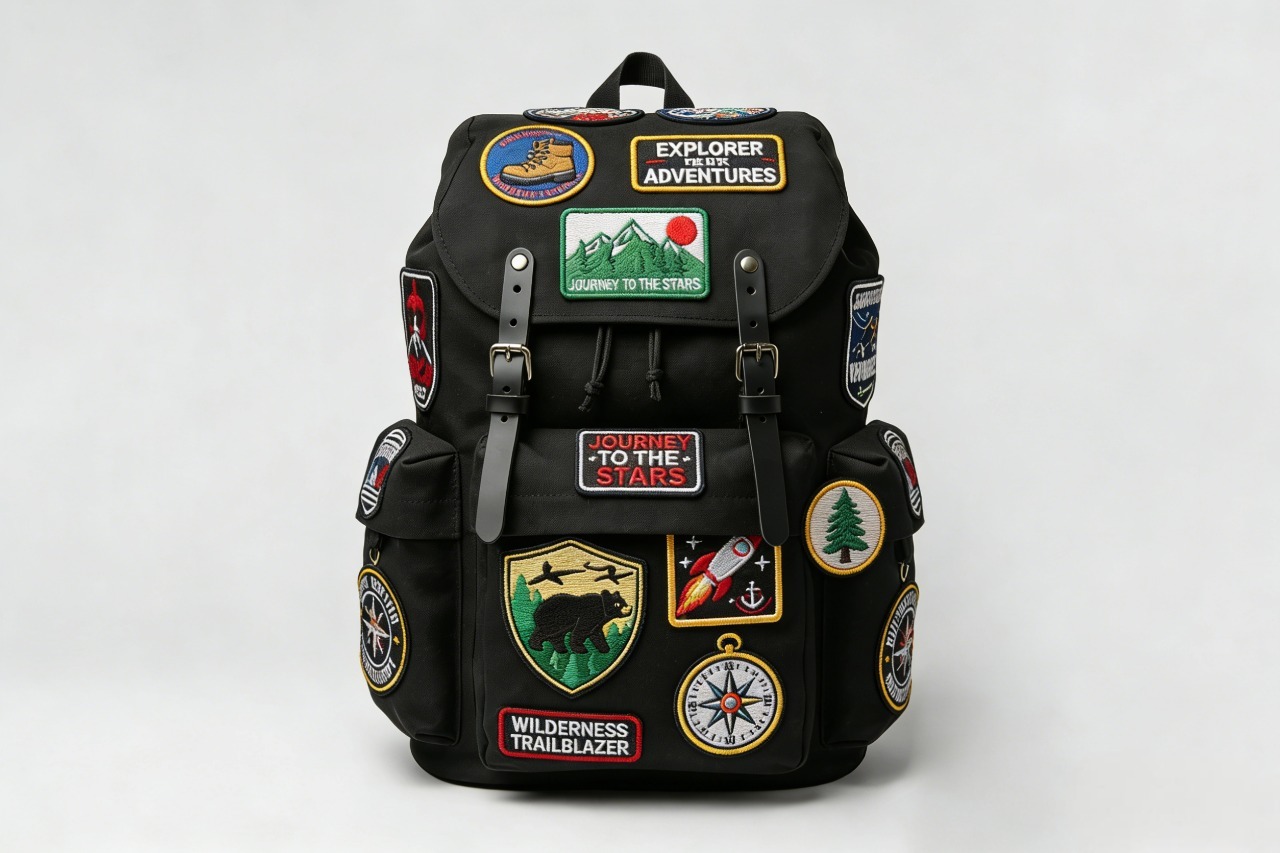
Patches, whether decorative, commemorative, brand-logoed, or functional (e.g., reflective, waterproof), play a pivotal role in enhancing both the aesthetic appeal and practical value of backpacks.
I. Introduction
Backpacks have evolved from mere functional carriers to personalized accessories that reflect individual style, brand identity, and even functional needs. However, the effectiveness of these patches hinges entirely on their fixation—poorly attached patches not only detract from the backpack’s appearance but may also peel off during daily use, rendering the patch useless and potentially damaging the backpack fabric. In real-world scenarios, a detached patch on a student’s backpack may ruin a carefully curated personal style, while a detached functional patch on an outdoor enthusiast’s backpack could compromise safety. Thus, selecting a reliable patch fixation method is critical to ensuring the longevity and performance of backpack patches.
Among the various patch fixation techniques available today, heat transfer (heat press) and sewing stand out as the two most widely used core methods. Heat transfer leverages thermal activation of adhesive layers to bond patches to backpack fabrics, offering efficiency and a seamless finish. Sewing, by contrast, uses thread to physically anchor patches to the backpack, providing a permanent and robust connection. Each method has its unique characteristics, advantages, and limitations, and their suitability varies significantly depending on factors such as backpack fabric type, patch material, usage scenario, and production scale.
II. Method 1: Heat Transfer (Heat Press) for Backpack Patches
2.1 Preparatory Requirements
Thorough preparation is the foundation of a successful heat transfer process, as any oversight can lead to poor adhesion, fabric damage, or patch distortion. The first step is to gather the essential materials, starting with heat transfer patches. These patches are typically constructed with a heat-activated adhesive layer on the back, which melts and bonds to the fabric when exposed to specific temperature and pressure conditions. It is crucial to select patches that are compatible with the backpack’s fabric; for example, vinyl heat transfer patches work well with cotton and polyester blends, while sublimation patches are ideal for 100% polyester fabrics.
Next, the backpack fabric itself must be evaluated for heat resistance. Fabrics such as cotton, polyester, and cotton-polyester blends are generally suitable for heat transfer, as they can withstand temperatures between 140–160°C without melting or discoloration. However, heat-sensitive fabrics like nylon, vinyl, spandex, or silk should be avoided, as high temperatures can cause them to shrink, warp, or lose their structural integrity. If the backpack’s fabric is unknown, a small, inconspicuous area (e.g., the inside of the strap) should be tested first to ensure it can tolerate the heat press parameters.
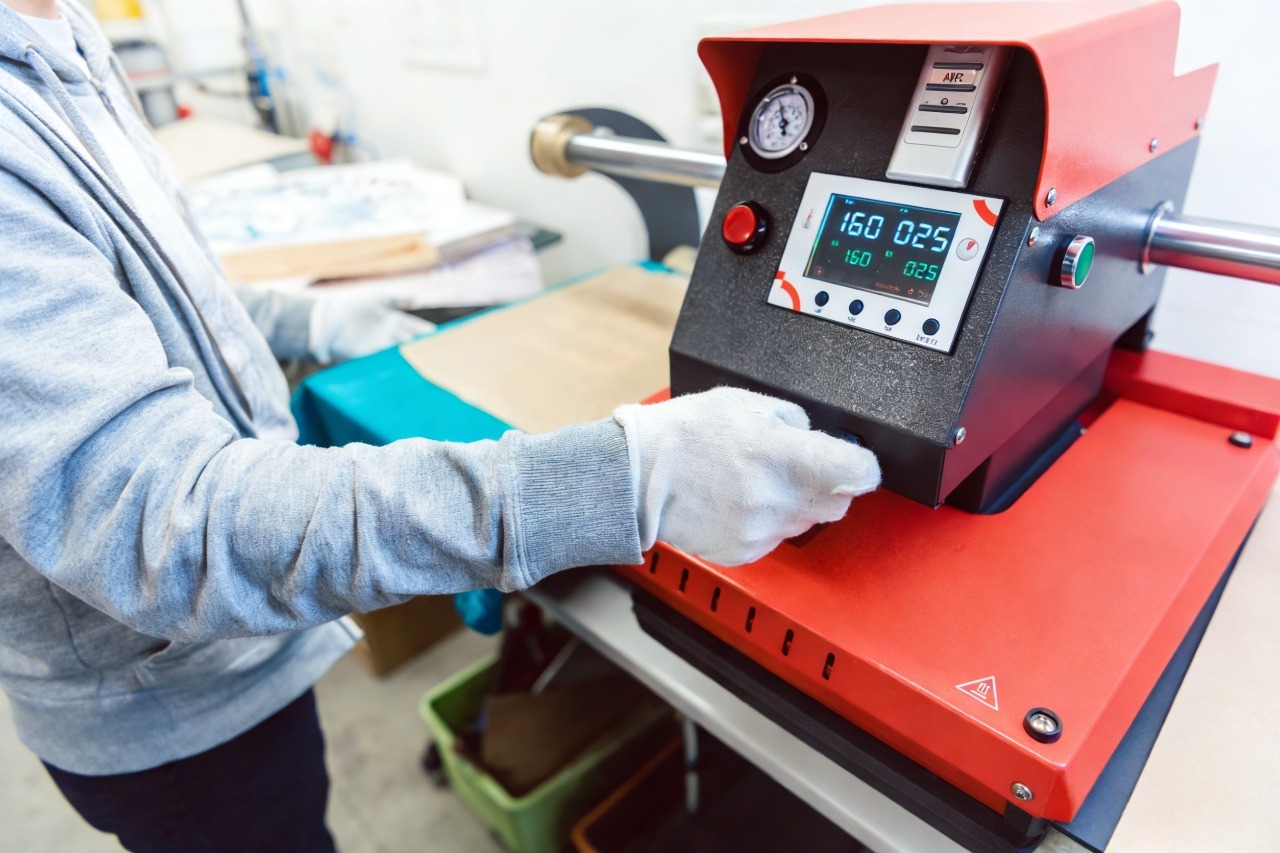
In terms of necessary tools, a heat press machine is the most reliable option for consistent results, especially for batch production. Heat press machines offer precise control over temperature, pressure, and time, which is difficult to achieve with household irons. However, for individual users or small-scale projects, a household iron with a flat, non-steam soleplate can be used as an alternative. Additional tools include heat-resistant tape (to secure the patch in place during pressing, preventing shifting), fabric cleaner (such as rubbing alcohol or a mild detergent) to remove dust, oil, or stains from the patch area, and a lint roller to eliminate any loose fibers that might interfere with adhesion.
Pre-treatment steps are equally important. The patch area on the backpack must be thoroughly cleaned and dried. Any contaminants on the fabric surface will create a barrier between the patch’s adhesive and the fabric, reducing bond strength. After cleaning, the area should be air-dried completely; using a hairdryer on a low-heat setting can speed up the process, but high heat should be avoided to prevent fabric damage. Additionally, it is recommended to pre-press the fabric for 5–10 seconds to remove any moisture or wrinkles, as moisture can cause steam pockets during the heat transfer process, leading to uneven adhesion.
2.2 Step-by-Step Operation Process
Once preparations are complete, the heat transfer process can be carried out in three key steps, with strict attention to parameter control and operational precision.
First, accurate positioning and fixation of the patch. Place the backpack on a flat, heat-resistant surface (such as a heat press mat or a thick towel if using a household iron). Position the heat transfer patch on the desired area, ensuring it is aligned correctly with the backpack’s design or user preferences. Use heat-resistant tape to secure the edges of the patch to the fabric; this prevents the patch from shifting during pressing, which can result in misalignment or wrinkling. It is important to use heat-resistant tape specifically designed for this purpose, as regular tape may melt under high temperatures and leave residue on the fabric.
Second, setting optimal heat press parameters. The success of heat transfer relies heavily on three core parameters: temperature, pressure, and duration. These parameters vary depending on the patch material and backpack fabric, and it is essential to follow the manufacturer’s recommendations for the heat transfer patches. As a general guideline, for cotton and polyester blend fabrics, the temperature should be set between 140–160°C, the pressure at medium-high (approximately 3–5 kg/cm²), and the duration at 15–30 seconds. For thicker fabrics or patches with a larger surface area, a slightly higher temperature (155–160°C) and longer duration (25–30 seconds) may be required. If using a household iron, set it to the cotton or linen setting (without steam), as steam can introduce moisture and affect adhesion. The pressure applied with a household iron should be firm and consistent, as the iron’s weight alone may not be sufficient; pressing down firmly with both hands throughout the duration is recommended.
Third, pressing and cooling. For heat press machines, close the press and apply the set pressure for the specified duration. Avoid opening the press prematurely, as this can disrupt the adhesive bonding process. For household irons, glide the iron slowly and evenly over the entire patch surface, ensuring all areas (especially the edges) receive equal heat and pressure. After the pressing time is complete, allow the patch to cool completely before peeling off the backing paper. Cooling is a critical step—cooling the adhesive allows it to solidify and form a strong bond with the fabric. Peeling the backing paper too early (while the patch is still hot) can cause the adhesive to pull away from the fabric, resulting in poor adhesion or patch damage. Once cooled, gently peel off the backing paper; if any part of the patch lifts with the paper, the area should be re-pressed for an additional 5–10 seconds and allowed to cool again.
2.3 Key Factors for Ensuring Firmness
To ensure the heat transfer patch remains firmly attached to the backpack, several key factors must be considered throughout the process.
First, fabric compatibility. As mentioned earlier, heat transfer is only effective on heat-resistant fabrics. Using heat transfer patches on heat-sensitive fabrics (e.g., nylon, vinyl) not only results in poor adhesion but also damages the fabric. For example, nylon fabric will melt at temperatures above 120°C, making it unsuitable for heat transfer. If the backpack is made of a heat-sensitive fabric, an alternative fixation method (such as sewing) should be used instead.
Second, precise parameter control. Insufficient heat or pressure will result in incomplete melting of the adhesive, leading to weak bond strength and easy peeling. Conversely, overheating or applying excessive pressure can damage the patch (e.g., discoloration, distortion) or the backpack fabric (e.g., shrinkage, scorching). It is therefore essential to calibrate the heat press machine regularly to ensure accurate temperature and pressure readings. For household iron users, practicing on a scrap piece of the same fabric before applying the patch to the backpack can help master the correct pressure and duration.
Third, post-operation check. After cooling and peeling the backing paper, inspect the patch thoroughly. Gently pull the edges of the patch with your fingers to test adhesion—there should be no lifting or movement. Check for any air bubbles or wrinkles under the patch; these can be punctured with a small pin (if necessary) and re-pressed to eliminate. If any areas of the patch are not properly adhered, re-press those specific areas (using heat-resistant tape to secure the patch again) and allow to cool completely. Additionally, avoid washing or using the backpack for at least 24 hours after heat transfer to allow the adhesive to fully cure and form the strongest possible bond.
III. Method 2: Sewing for Backpack Patches
3.1 Preparatory Requirements
Sewing is a traditional yet highly reliable method for fixing patches to backpacks, offering permanent adhesion that withstands frequent use and washing. Unlike heat transfer, sewing is not limited by fabric heat resistance, making it suitable for a wide range of materials. The preparatory process for sewing focuses on selecting the right materials and tools, as well as accurate pre-positioning.
Essential materials include sew-on patches and suitable threads. Sew-on patches are designed with pre-punched holes or a thick edge that allows for easy stitching; they do not have an adhesive layer, relying instead on thread to secure them to the backpack. The thread selection is critical—polyester thread is generally preferred for its high strength, abrasion resistance, and resistance to fading and shrinkage, making it ideal for backpacks that are frequently used or washed. Cotton thread is softer and more breathable but is less durable and may fade over time, making it suitable for decorative patches on backpacks that are used infrequently. The thread color should match or complement both the patch and the backpack fabric; for a subtle look, choose a thread color that matches the patch’s edge, while a contrasting color can add a decorative touch.
Necessary tools vary depending on whether machine sewing or hand sewing is used. For machine sewing, an industrial or domestic sewing machine with adjustable stitch settings is recommended. Industrial sewing machines are more powerful and suitable for thick fabrics (e.g., canvas, leather), while domestic machines work well for lighter fabrics (e.g., cotton, polyester blends). The machine should be equipped with the appropriate needle—sharp needles (e.g., universal needles size 11–14) for light to medium fabrics, and heavy-duty needles (e.g., denim needles size 16–18) for thick or tough fabrics like canvas or leather. For hand sewing, a hand-sewing kit including needles (sharp or blunt, depending on fabric thickness), a thimble (to protect fingers when pushing the needle through thick fabric), thread, scissors, and chalk or a water-soluble marker is essential.
Pre-positioning is a crucial preparatory step to ensure the patch is aligned correctly. Start by cleaning the patch area on the backpack to remove any dust or debris. Use chalk or a water-soluble marker to mark the exact position of the patch—this helps guide the sewing process and ensures alignment. Once the position is marked, pin the patch firmly to the backpack using sewing pins. The pins should be placed along the edge of the patch, spaced 2–3 cm apart, to prevent the patch from shifting during sewing. For thick or stiff fabrics, it may be necessary to use longer pins to ensure they penetrate both the patch and the backpack fabric securely.
3.2 Step-by-Step Operation Process
Sewing can be done using a sewing machine or by hand, each with its own steps and techniques to ensure firm adhesion.
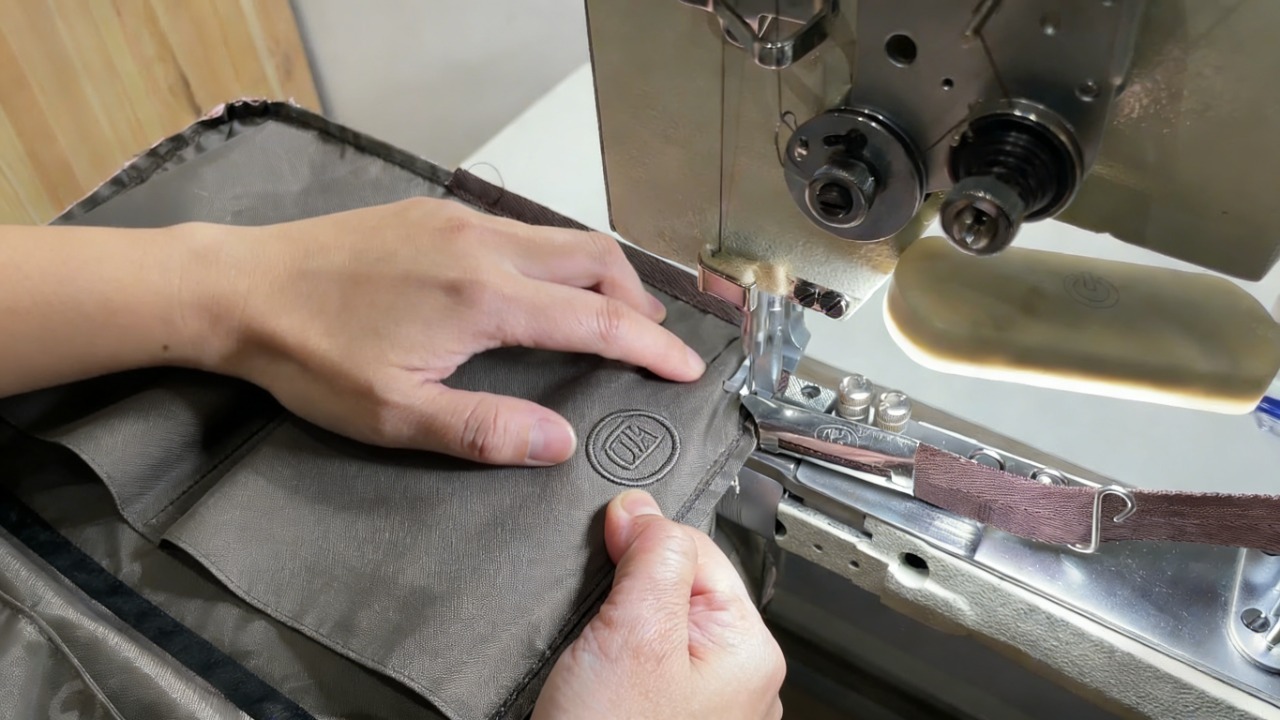
First, machine sewing. Begin by selecting the appropriate stitch type—straight stitch or zigzag stitch are the most common for patch fixation. A straight stitch is ideal for patches with a clean, narrow edge, providing a neat and secure hold. A zigzag stitch (with a width of 3–4 mm and length of 2–3 mm) is preferred for patches with irregular edges or for added durability, as it covers more of the patch edge and distributes tension evenly. Set the sewing machine to the selected stitch and thread it with the chosen thread, ensuring the bobbin is also threaded correctly. Position the backpack (with the pinned patch) under the sewing machine’s presser foot, aligning the needle with the edge of the patch (approximately 1–2 mm from the edge). Lower the presser foot and start sewing, moving the backpack slowly and steadily to ensure even stitches. Sew along the entire edge of the patch, maintaining a consistent distance from the edge. At the corners, stop with the needle down, lift the presser foot, rotate the backpack 90 degrees, lower the presser foot, and continue sewing. Once the entire edge is sewn, backstitch a few stitches at the starting point to secure the thread and prevent unraveling. Cut the excess thread with scissors.
Second, hand sewing. Hand sewing is more time-consuming than machine sewing but offers greater flexibility, especially for small patches, irregularly shaped patches, or backpacks with hard-to-reach areas (e.g., near zippers or straps). The two most effective hand-sewing stitches for patch fixation are the blanket stitch and the whip stitch. For a blanket stitch, start by threading the needle and tying a knot at the end of the thread. Insert the needle from the back of the backpack fabric (under the patch) to the front, pulling the thread tight so the knot is hidden between the patch and the fabric. Hold the patch firmly in place and bring the needle around the edge of the patch, inserting it back into the fabric a short distance (2–3 mm) from the first stitch. Loop the thread around the needle before pulling it tight, creating a small loop along the patch edge. Repeat this process along the entire edge of the patch, keeping the stitches evenly spaced (2–3 mm apart). For a whip stitch, insert the needle from the back of the fabric to the front, then wrap the thread around the edge of the patch and insert the needle back into the fabric adjacent to the first stitch. Pull the thread tight to secure the patch edge, and repeat along the entire perimeter. Regardless of the stitch type, tie a secure knot at the end of the sewing process (hidden between the patch and the fabric) to prevent unraveling.
Third, finishing steps. After sewing, trim any excess thread using sharp scissors, being careful not to cut the stitches or the backpack fabric. For added durability, reinforce stress points such as the patch corners or areas that are likely to experience frequent pulling (e.g., near backpack straps) with extra stitches. For machine sewing, this can be done by backstitching over the corner area 2–3 times. For hand sewing, add a few extra stitches at the corners to create a secure anchor. If the backpack fabric is thin or stretchy, it may be necessary to reinforce the area under the patch with interfacing before sewing—this adds stability to the fabric and prevents it from stretching or tearing around the stitches.
3.3 Key Factors for Ensuring Firmness
Several key factors contribute to the firmness and longevity of sewn patches on backpacks.
First, thread selection. As mentioned earlier, high-strength, durable thread (such as polyester thread) is essential for withstanding the friction, tension, and washing that backpacks are subjected to. Using low-quality or weak thread will result in stitches that break easily, leading to patch loosening or detachment. For outdoor backpacks or backpacks used in harsh environments, consider using UV-resistant thread to prevent fading and degradation from sun exposure.
Second, stitch technique. The stitches must fully cover the edge of the patch to ensure a secure hold. Incomplete edge coverage will leave parts of the patch unanchored, making it prone to lifting. Stitches should be even and tight—loose stitches can shift over time, while overly tight stitches can cause the fabric to pucker, affecting both the aesthetic and the bond strength. Skipping stitches (a common issue with machine sewing) should be avoided, as they create weak points in the seam. If a skipped stitch is noticed, backtrack the sewing machine to the start of the skipped area and re-sew.
Third, fabric adaptation. Different backpack fabrics require different sewing techniques and tools. For thick fabrics like canvas or leather, a heavy-duty needle and strong thread are necessary, and it may be helpful to pre-punch holes in the fabric (using an awl) to make sewing easier. For thin or stretchy fabrics, using a stabilizer or interfacing under the patch prevents the fabric from stretching during sewing, ensuring the stitches remain secure. For mesh or porous fabrics, a zigzag stitch is preferred over a straight stitch, as it covers more of the fabric surface and provides a stronger hold.
IV. Comparison of Heat Transfer and Sewing Methods for Backpack Patch Firmness
To help users make an informed decision between heat transfer and sewing, this section compares the two methods across four key dimensions: firmness and durability, applicability, operation difficulty and efficiency, and aesthetic effect.
4.1 Firmness and Durability
Firmness and durability are critical considerations for backpack patches, as backpacks are frequently used, washed, and subjected to various forms of stress. Heat transfer patches offer strong adhesion on compatible fabrics when applied correctly, with the adhesive forming a tight bond with the fabric fibers. However, their durability is limited by the adhesive’s resistance to washing and tension. Frequent washing (especially with hot water or harsh detergents) can break down the adhesive over time, leading to patch peeling. High tension or pulling (e.g., when the backpack is heavily loaded or the patch catches on objects) can also cause the adhesive to fail, resulting in patch detachment. In general, heat transfer patches are suitable for backpacks that are used casually and washed infrequently.
Sewing, by contrast, provides permanent fixation that is highly resistant to wear, washing, and pulling. The thread physically anchors the patch to the backpack fabric, creating a mechanical bond that is not affected by water or detergent. Sewn patches can withstand repeated washing (even with hot water) and heavy use, making them ideal for outdoor backpacks, work backpacks, or any backpack that is subjected to harsh conditions. The durability of sewn patches is further enhanced by the choice of high-strength thread and proper stitch technique—with correct sewing, a patch can remain securely attached for the lifetime of the backpack. In tests comparing the two methods, sewn patches retained their adhesion after 50+ washes, while heat transfer patches showed significant peeling after 20–30 washes.
4.2 Applicability
The applicability of each method is largely determined by the backpack fabric type, patch design, and production scale. Heat transfer is best suited for smooth, heat-resistant fabrics such as cotton, polyester, and cotton-polyester blends. It is not suitable for heat-sensitive fabrics (nylon, vinyl, spandex) or rough, textured fabrics (e.g., canvas, burlap), as the uneven surface of textured fabrics prevents the adhesive from forming a uniform bond. Heat transfer is also ideal for batch operations, such as mass-produced backpacks with brand logos—once the heat press parameters are set, multiple patches can be applied quickly and consistently.
Sewing, on the other hand, is highly versatile and compatible with all fabric types, including thick canvas, mesh, leather, nylon, and even delicate fabrics (when using appropriate needles and threads). This makes it the preferred method for backpacks made of heat-sensitive or textured fabrics. Sewing is also well-suited for custom, single-piece projects, such as personalized backpacks with unique patch designs or irregularly shaped patches. Unlike heat transfer, which requires the patch to have a heat-activated adhesive layer, sewing can be used with any sew-on patch, including handcrafted patches, leather patches, or patches made from unusual materials. Additionally, sewing can be used to repair loose or peeling patches (both heat transfer and sewn), making it a more flexible solution for maintenance.
4.3 Operation Difficulty and Efficiency
The operation difficulty and efficiency of each method vary significantly, making them suitable for different users and production scales. Heat transfer has relatively simple steps: prepare the fabric and patch, position and secure the patch, set the heat press parameters, and press and cool. The main challenge is achieving precise control over temperature, pressure, and time—this requires some practice, especially when using a household iron instead of a heat press machine. However, once the parameters are mastered, heat transfer is highly efficient. A heat press machine can apply a patch in 15–30 seconds, making it ideal for mass production (e.g., factories producing hundreds of backpacks per day). For individual users, heat transfer is a quick and easy way to apply patches without the need for advanced sewing skills.
Sewing has a higher skill requirement, especially for machine sewing. Users need to master basic sewing machine operations (threading, stitch selection, guiding the fabric) and ensure even, consistent stitches along the patch edge. Hand sewing is even more time-consuming, requiring patience and precision to create neat, secure stitches. The speed of sewing is significantly slower than heat transfer—machine sewing a single patch can take 1–2 minutes, while hand sewing can take 5–10 minutes or more. However, sewing offers greater flexibility for complex patch shapes (e.g., circular, irregular, or small patches) that may be difficult to position or press with heat transfer. For small-scale custom projects or users who value craftsmanship over speed, sewing is a more suitable option.
4.4 Aesthetic Effect
The aesthetic effect of the patch fixation method is an important consideration for users who value the backpack’s appearance. Heat transfer offers a smooth, flush surface with no visible stitches, allowing the patch’s original design to be displayed in full integrity. This is particularly advantageous for patches with intricate designs, fine details, or vibrant colors, as stitches would not obscure any part of the design. Heat transfer patches also have a modern, clean look that complements casual backpacks, fashion backpacks, or backpacks with a minimalist design.
Sewing, by contrast, adds a vintage, handcrafted look to the backpack, with visible stitches along the patch edge. This aesthetic is highly sought after for outdoor backpacks, retro-style backpacks, or handcrafted items. The color of the thread can be used to enhance the patch’s design—for example, a contrasting thread color can make the patch stand out, while a matching thread color can create a subtle, integrated look. However, the stitches may slightly cover the edge of the patch, which can be a disadvantage for patches with very fine or delicate edges. Additionally, uneven stitches can detract from the aesthetic, making it important for users to have good sewing skills to achieve a neat finish.
V. Post-Fixation Maintenance Tips to Enhance Patch Longevity
Regardless of the fixation method used, proper post-fixation maintenance is essential to enhance the longevity of backpack patches. This section provides practical maintenance tips for both heat transfer and sewn patches.
First, washing guidelines. For heat transfer patches, it is recommended to wash the backpack in cold water (30°C or below) using a mild detergent. Hot water can soften the adhesive, leading to peeling, while harsh detergents (such as those containing bleach or fabric softeners) can break down the adhesive and damage the patch. Avoid machine washing when possible; hand washing is gentler and reduces the mechanical stress on the patch. If machine washing is necessary, place the backpack in a laundry bag to protect the patch from rubbing against other items. For sewn patches, cold or warm water can be used, but harsh detergents should still be avoided to prevent thread fading and degradation. Both heat transfer and sewn patches should be air-dried instead of machine-dried—high temperatures in the dryer can damage the adhesive (for heat transfer) or weaken the thread (for sewing), and the tumbling motion can cause the patch to lift or the stitches to break.
Second, daily care. To minimize damage to the patch, avoid rubbing or pulling the patch edges during daily use. When placing or removing items from the backpack, be careful not to catch the patch on sharp objects or rough surfaces. Store the backpack in a dry, well-ventilated environment to prevent mold growth, which can damage both the patch and the backpack fabric. Avoid exposing the backpack to prolonged direct sunlight, as UV rays can fade the patch color and weaken the adhesive (for heat transfer) or thread (for sewing). For outdoor backpacks used in wet conditions, dry the backpack thoroughly as soon as possible to prevent water from seeping under the patch and weakening the bond.
Third, repair measures. If a heat transfer patch starts to lift at the edges, it can be repaired by re-pressing the area. Clean the patch and the surrounding fabric, secure the patch with heat-resistant tape, and re-press using the original heat transfer parameters (reducing the duration by 5–10 seconds to avoid overheating). Allow the patch to cool completely before checking the adhesion. For sewn patches with loose stitches, use a needle and thread to reinforce the loose area—backstitch a few times to secure the thread and prevent further unraveling. If the thread is severely damaged or broken, remove the old thread and re-sew the entire edge of the patch. For patches that are completely detached, reapply them using the original fixation method (heat transfer or sewing), ensuring the fabric is clean and dry before reattachment.
VI. Conclusion
In summary, heat transfer and sewing are two effective methods for fixing patches to backpacks, each with its own core advantages and limitations. Heat transfer offers high efficiency, a clean aesthetic, and ease of operation, making it ideal for batch production and casual backpacks made of heat-resistant fabrics. It excels at preserving the patch’s original design integrity and is a great choice for users with limited sewing skills. Sewing, by contrast, provides permanent, durable fixation that is compatible with all fabric types, making it suitable for outdoor backpacks, heavy-use backpacks, and custom projects. It offers a vintage, handcrafted aesthetic and superior resistance to wear and washing, though it requires more skill and time.
The choice between the two methods should be based on the specific usage scenario. For mass-produced casual backpacks, brand-logoed backpacks, or users seeking a quick, seamless finish, heat transfer is the optimal choice. For outdoor backpacks, work backpacks, backpacks made of heat-sensitive or textured fabrics, or custom, single-piece projects, sewing is recommended. In high-demand applications where maximum firmness is required (e.g., tactical backpacks, heavy-duty work backpacks), a combination of both methods—using heat transfer to secure the main body of the patch and sewing to reinforce the edges—can provide the best of both worlds, ensuring both strong adhesion and long-term durability.
Ultimately, the key to ensuring patches stay secure on backpacks lies in selecting the right method for the fabric, patch, and usage requirements, followed by proper preparation, operation, and maintenance. By understanding the strengths and weaknesses of heat transfer and sewing, users can make informed decisions that maximize the longevity and aesthetic value of their backpack patches, enhancing both the functionality and personalization of their backpacks.


PEPHAWK is proud to highlight our integrated one-stop service—seamlessly combining professional design, R&D, and manufacturing capabilities to deliver cohesive, end-to-end solutions for our valued clients.
Our core product range covers a diverse selection of high-quality accessories and silicone-based items, including:
- Garment Accessories: Silicone Labels, Micro Fiber Labels, TPU Labels, Leather Labels
- Electronic & Lifestyle Gadgets: Silicone Mobile Phone Skins, Silicone MP3 Skins, Silicone Chaplets, Silicone Bracelets
Beyond our core offerings, we also connect clients with complementary products through our trusted affiliated companies, ensuring all your needs are met under one partnership.
What sets us apart is our specialized expertise in key manufacturing processes: Silk Screen Printing, High-Frequency Welding, Sublimation Printing, Seamless Fabric Processing, and Laser Cutting. These capabilities allow us to serve a wide array of industries—from garments, shoes, caps, and gloves to electronic devices, bags, and sporting equipment—with products that blend durability, functionality, and aesthetic appeal.
At PEPHAWK, customer satisfaction is our top priority. We’re committed to providing responsive, thorough support, and guarantee a same-day response to all inquiries—no exceptions. You can rely on us for consistent quality, reliable delivery, and a partnership that’s as efficient as it is trustworthy.
Whether you’re looking for custom apparel labels, protective silicone skins, or tailored manufacturing solutions, PEPHAWK has the expertise and flexibility to bring your vision to life.
Popular Designs, Sizes and Shapes of Soccer Club Patches
A Comprehensive Guide to Woven Label Textures for Apparel Accessories




SEND MESSAGE