

How to Use Different Heat Press Machines for Iron-On Clothing Patches
2025-12-31
Step-by-step instructions, tips & troubleshooting to achieve durable adhesion of Patch for DIYers and businesses.
Table of Contents
- 1. Introduction
- 2. Basic Principles of Iron-On Patch Application
- 3. Household-Grade Heat Press Tools for Iron-On Patches
- 4. Industrial-Grade Heat Press Machines for Iron-On Patches
- 5. Troubleshooting Common Issues with Heat Press Machines
- 6. Machine Selection Guide for PEPHAWK Iron-On Patch Users
Iron-on clothing patches have become a staple in the fashion, promotional, and DIY industries, offering a quick, versatile way to add branding, personality, or repairs to garments. As a leading manufacturer of custom iron-on patches in China, PEPHAWK specializes in producing high-quality patches with heat-activated adhesive backings designed for compatibility with a wide range of heat press tools—from household irons to industrial-grade machines. The success of applying an iron-on patch hinges not just on the patch’s quality, but also on choosing the right heat press machine and following proper application techniques. This guide will break down the usage of different heat press tools, tailored to PEPHAWK’s iron-on patches, to help DIY enthusiasts, small businesses, and large-scale manufacturers achieve durable, professional results.
1. Introduction
Iron-on clothing patches (also known as heat transfer patches) are designed with a heat-sensitive adhesive layer that melts and bonds to fabric when exposed to controlled heat and pressure. PEPHAWK’s iron-on patches are crafted using premium adhesives that offer strong, wash-resistant adhesion—capable of withstanding up to 50+ washes without peeling—making them ideal for both personal use and commercial applications.
However, the effectiveness of these patches depends largely on the heat press machine used. Different machines vary in temperature control, pressure distribution, and production capacity, meaning what works for a DIY crafter may not be suitable for a clothing factory processing thousands of garments. This guide covers the most common heat press tools, from accessible household options to industrial workhorses, providing step-by-step instructions, pros and cons, and PEPHAWK-specific tips to ensure optimal adhesion and fabric protection.
Whether you’re a hobbyist looking to customize a jacket, a small business owner producing branded merchandise, or a large manufacturer fulfilling bulk orders, this guide will help you select the right machine and master the application process for PEPHAWK’s iron-on patches.
2. Basic Principles of Iron-On Patch Application
Before diving into machine-specific instructions, it’s critical to understand the core principles that govern successful iron-on patch application—principles that align with PEPHAWK’s product design and adhesive specifications.
2.1 Adhesion Mechanism
PEPHAWK’s iron-on patches use a thermoplastic adhesive that activates at temperatures between 130°C and 160°C (266°F and 320°F). When heat and pressure are applied, the adhesive melts, seeps into the fabric’s fibers, and solidifies as it cools, creating a permanent bond. The key is to balance three factors: temperature (to melt the adhesive without damaging fabric), pressure (to ensure the adhesive penetrates fibers), and time (to allow full activation without overheating).
2.2 Critical Success Factors
-
Temperature: PEPHAWK’s adhesive is formulated to work with most fabrics, but temperature must be adjusted based on fabric type. Cotton and linen require higher temperatures (150–160°C), while polyester and delicate fabrics need lower heat (130–140°C) to avoid melting or discoloration.
-
Pressure: Even pressure is essential—uneven pressure leads to partial adhesion and peeling. PEPHAWK recommends a pressure range of 3–8kg/cm², depending on the machine and fabric thickness.
-
Time: Application time varies by machine and patch size, typically 8–20 seconds. Over-pressing can damage the adhesive or fabric, while under-pressing results in poor adhesion.
-
Fabric Compatibility: PEPHAWK’s patches work on natural fibers (cotton, linen), synthetic fibers (polyester, nylon), and blends, but avoid heat-sensitive fabrics like silk or wool (use cold-application patches instead).
2.3 Pre-Application Preparation
To ensure the best results with PEPHAWK’s iron-on patches, follow these pre-application steps:
-
Inspect the Patch: Check that the adhesive backing is intact (no cracks or missing sections). For embroidered patches, ensure threads are secure to prevent fraying during pressing.
-
Pre-Wash the Garment: New garments often have sizing or chemicals that can interfere with adhesion. Wash and dry the garment (without fabric softener) before application.
-
Clean the Surface: Wipe the application area with a damp cloth to remove dust, oil, or debris. Ensure the fabric is completely dry and wrinkle-free—wrinkles create gaps between the patch and fabric.
-
Test on a Swatch: If using a new fabric or machine, test the patch on a hidden area (e.g., inside a seam) to confirm temperature and time settings without risking the garment.
3. Household-Grade Heat Press Tools for Iron-On Patches
Household-grade tools are ideal for DIY enthusiasts, crafters, and small-batch users who need accessibility and affordability. PEPHAWK’s iron-on patches are designed to work seamlessly with these tools, making customizations easy for non-professionals.
3.1 Traditional Household Iron
The most accessible option, a standard household iron is perfect for occasional patch application or small projects.
3.1.1 Key Features & Suitable Scenarios
-
Features: Dry heat function (critical for adhesion), adjustable temperature settings, flat soleplate (preferred over steam irons for even pressure).
-
Scenarios: DIY projects (e.g., customizing jeans, backpacks), small-batch gifts, or hobbyists working with patches ≤10cm in size.
3.1.2 Step-by-Step Usage Guide (PEPHAWK Recommended)
-
Set the Temperature: Refer to PEPHAWK’s fabric guide:
-
Cotton/linen: High heat (150–160°C, “cotton” setting).
-
Polyester/blends: Medium heat (130–140°C, “synthetic” setting).
-
Avoid steam—moisture weakens PEPHAWK’s adhesive. Use the “dry heat” mode.
-
-
Prepare the Workspace: Place the garment on a hard, flat surface (e.g., a wooden table covered with a thick towel). Avoid ironing boards with padding, as they absorb pressure.
-
Position the Patch: Align the patch on the garment (use a ruler or chalk for precision). Ensure the adhesive side (shiny or matte backing) is facing down.
-
Protect the Patch & Fabric: Cover the patch with a thin cotton cloth (e.g., a tea towel) or PEPHAWK’s recommended Teflon sheet to prevent direct heat damage.
-
Apply Pressure: Press the iron firmly onto the cloth-covered patch. Hold in place for 10–15 seconds (do not slide the iron—this causes uneven adhesion). Apply extra pressure to the edges of the patch to ensure full bonding.
-
Cool Down: Allow the patch to cool completely (5–10 minutes) before handling. Do not peel the cloth or touch the patch while it’s hot—this can disrupt the adhesive bond.
3.1.3 Pros & Cons
-
Pros: No extra equipment needed, low cost, easy to use for beginners.
-
Cons: Uneven pressure (risk of partial adhesion), limited to small patches, not suitable for thick fabrics or 3D patches.
3.1.4 PEPHAWK’s Expert Tips
-
For embroidered patches, focus pressure on the edges to ensure the adhesive bonds around the threadwork.
-
If the patch feels loose after cooling, re-press for 5–8 seconds with increased pressure.
-
Avoid using irons with non-stick soleplates that scratch easily—they can damage embroidered patches.
3.2 Mini Heat Press Machine (Portable)
A upgrade from household irons, mini heat presses are compact, portable, and designed for small projects like patches, hats, or sleeves. They offer better temperature and pressure control than irons, making them a favorite among crafters and small businesses.
3.2.1 Key Features & Suitable Scenarios
-
Features: Adjustable temperature (80–200°C), built-in pressure gauge, compact size (typically 10x10cm or 15x15cm platen), lightweight (1–2kg).
-
Scenarios: Small-batch production (20–50 units), on-the-go customizations (e.g., craft fairs), curved surfaces (sleeves, hats), or patches up to 15cm in size.
3.2.2 Step-by-Step Usage Guide (PEPHAWK Recommended)
-
Power On & Preheat: Plug in the mini press and set the temperature to PEPHAWK’s recommended level (130–160°C, based on fabric). Wait for the ready indicator (usually a light or beep) to confirm the machine is heated.
-
Prepare the Garment: Smooth the fabric and secure it with clips to prevent shifting. For curved surfaces (e.g., a sleeve), use a heat-resistant mat to support the garment.
-
Position the Patch: Place the patch with the adhesive side down. Use alignment tools (e.g., PEPHAWK’s adhesive alignment stickers) for precision.
-
Cover & Press: Place a Teflon sheet over the patch. Lower the mini press onto the patch and apply firm, even pressure (use the machine’s built-in handle for leverage). Hold for 8–12 seconds.
-
Peel & Cool: For standard patches, use the “cold peel” method—wait 3–5 minutes before removing the Teflon sheet. For PEPHAWK’s 3D iron-on patches, use “hot peel” (remove the sheet immediately after pressing) and let cool for 10 minutes.
3.2.3 Pros & Cons
-
Pros: Even pressure (better adhesion than irons), portable, suitable for curved surfaces, compatible with most PEPHAWK patch types.
-
Cons: Limited platen size (not for large patches), slower than industrial machines for bulk orders.
3.2.4 PEPHAWK’s Expert Tips
-
For thick patches (e.g., PVC or 3D embroidered patches), increase pressure to 5–6kg/cm² and extend pressing time by 2–3 seconds.
-
Clean the platen after each use with a soft cloth to remove adhesive residue—this ensures consistent pressure for future applications.
-
Use the mini press’s “auto-shutoff” feature (if available) to prevent overheating when not in use.
4. Industrial-Grade Heat Press Machines for Iron-On Patches
Industrial-grade machines are designed for high-volume production, offering precise control, speed, and consistency—critical for PEPHAWK’s B2B clients, such as clothing factories, promotional product companies, and fast fashion brands. These machines handle large batches, thick fabrics, and oversized patches with ease.
4.1 Clamshell Heat Press Machine
The most common industrial machine, clamshell presses feature a hinged upper platen that closes like a clamshell. They balance efficiency and affordability, making them ideal for medium-to-large businesses.
4.1.1 Key Features & Suitable Scenarios
-
Features: Large platen size (15x15in/38x38cm or 16x20in/40x50cm), precise temperature control (0–200°C), adjustable pressure (3–8kg/cm²), auto-timer, and non-stick Teflon platen.
-
Scenarios: Medium-to-large batches (50–500 units/day), clothing brands, promotional product manufacturers, and PEPHAWK’s bulk order clients. Suitable for flat garments (t-shirts, jackets, bags) and patches up to 20cm in size.
4.1.2 Step-by-Step Usage Guide (PEPHAWK Recommended for Bulk Production)
-
Calibrate Settings: Use PEPHAWK’s bulk patch parameters:
-
Temperature: 145–155°C (ideal for most fabrics and PEPHAWK’s adhesive).
-
Pressure: 4–6kg/cm² (adjust based on fabric thickness—thicker denim may need 6kg/cm²).
-
Timer: 12–18 seconds (longer for large or thick patches).
-
-
Preheat the Machine: Allow the press to warm up for 10–15 minutes to ensure temperature stability. Test the platen temperature with a heat probe to confirm accuracy.
-
Prepare Garments: Load the garment onto the lower platen, smoothing out wrinkles. For bulk production, use a conveyor system or garment holder to speed up loading.
-
Position Patches: Use alignment guides (e.g., grid lines on the platen) to place multiple patches uniformly. For branded merchandise, use PEPHAWK’s custom alignment templates to ensure consistent placement across all garments.
-
Cover & Press: Place a Teflon sheet over the patches to protect the fabric and prevent adhesive from sticking to the platen. Close the press firmly—ensure the upper platen is fully locked to maintain even pressure.
-
Cool & Inspect: After the timer expires, open the press and remove the garment. Let it cool for 5–10 minutes before inspecting adhesion. For large batches, use a quality control station to check for peeling edges or misalignment—re-press any defective items immediately.
4.1.3 Pros & Cons
-
Pros: High efficiency (process 10–15 garments per hour), consistent results, large platen size for multiple patches, suitable for most PEPHAWK patch types.
-
Cons: Bulky (requires dedicated space), higher cost than household tools, not ideal for curved surfaces.
4.1.4 PEPHAWK’s Tips
-
For custom orders with unique fabric types (e.g., performance wear), PEPHAWK provides personalized temperature/pressure guides to ensure compatibility.
-
Invest in a clamshell press with a removable lower platen for easy cleaning—this reduces downtime between batches.
-
Use the press’s “batch mode” (if available) to program settings for repeat orders, saving time on recalibration.
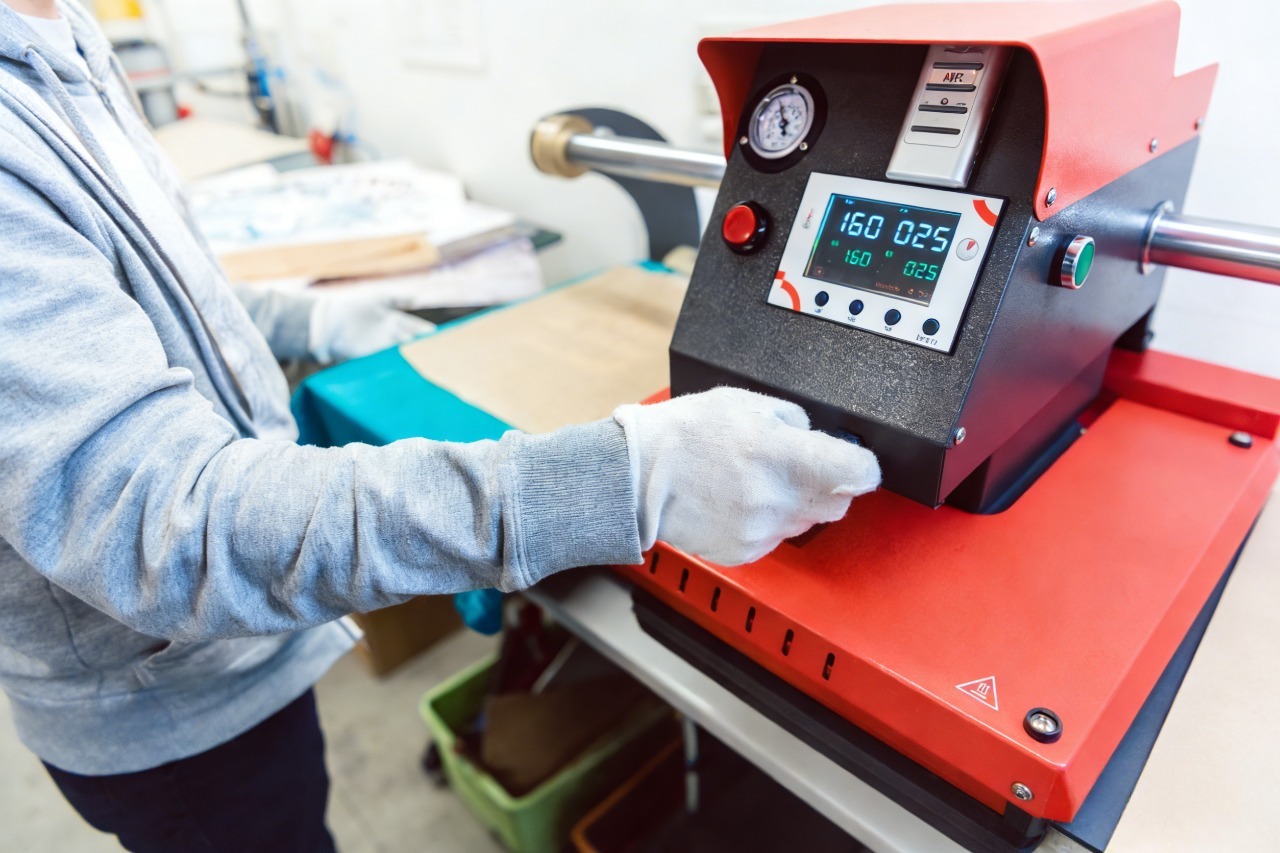
4.2 Swing-Away Heat Press Machine
Swing-away presses feature an upper platen that swings open to the side, offering safer operation and better access to the lower platen. They are ideal for thick fabrics, 3D patches, and industrial-scale production.
4.2.1 Key Features & Suitable Scenarios
-
Features: Large platen (up to 20x25in/50x63cm), even heat distribution (±2°C), heavy-duty construction (for high-pressure applications), and swing-open design (reduces burn risk).
-
Scenarios: Industrial production (500+ units/day), thick fabrics (denim, canvas, leather), 3D iron-on patches (PEPHAWK’s premium line), and large-scale brands. Suitable for flat and slightly curved garments.
4.2.2 Step-by-Step Usage Guide (PEPHAWK Recommended for 3D & Thick Patches)
-
Set Parameters: For PEPHAWK’s 3D patches and thick fabrics:
-
Temperature: 150–160°C (higher heat penetrates thick fibers).
-
Pressure: 6–8kg/cm² (firm pressure ensures the adhesive bonds to deep fabric layers).
-
Timer: 15–20 seconds (longer to activate the adhesive in 3D foam layers).
-
-
Preheat & Prepare: Warm the machine for 15 minutes. Place a heat-resistant mat under the lower platen to protect the workspace. Secure the garment with clips to prevent shifting.
-
Position the Patch: For 3D patches, ensure the foam layer is facing up (adhesive side down). Use alignment tools to center the patch—3D patches require precise placement to maintain their shape.
-
Press Safely: Swing the upper platen down over the patch. Avoid touching the platen or garment during pressing (the swing design keeps hands clear of hot surfaces). Lock the platen in place to maintain pressure.
-
Cool Completely: After the timer, swing the platen open and let the garment cool for 10–15 minutes. 3D patches need extra cooling time to set the foam layer and adhesive—do not handle until fully cool.
4.2.3 Pros & Cons
-
Pros: Safe operation, even pressure for thick patches, high precision, suitable for PEPHAWK’s premium 3D line.
-
Cons: Higher price point (2–3x more than clamshell presses), slower than roller presses for mass production.
4.2.4 PEPHAWK’s Expert Tips
-
For leather or synthetic leather garments, reduce temperature to 140°C and use a silicone pad under the garment to prevent cracking.
-
Clean the platen with a adhesive remover (e.g., isopropyl alcohol) to remove residue from 3D patch foam.
-
Train operators to check platen alignment monthly—misalignment can cause uneven pressure and defective patches.
4.3 Heat Press Transfer Machine (Roller Type)
Roller presses (also known as continuous heat presses) are designed for mass production, featuring a conveyor belt that feeds garments through heated rollers. They offer ultra-high speed and consistency, ideal for large-scale brands and PEPHAWK’s biggest B2B clients.
4.3.1 Key Features & Suitable Scenarios
-
Features: Continuous conveyor system, automated temperature/pressure control, high-speed production (1–3m/min), and adjustable roller width (up to 1.8m).
-
Scenarios: Mass production (1000+ units/day), fast fashion brands, promotional product manufacturers, and PEPHAWK’s bulk orders (minimum 500 units). Suitable for flat garments (t-shirts, hoodies, towels) and large patches.
4.3.2 Step-by-Step Usage Guide (Industrial-Scale Application)
-
Configure Settings: Use PEPHAWK’s mass-production parameters, programmed via the machine’s touchscreen:
-
Temperature: 145–150°C.
-
Pressure: 4–5kg/cm² (adjust via roller tension).
-
Speed: 1–2m/min (slower for large patches, faster for small ones).
-
-
Load Garments: Feed garments onto the conveyor belt—use an automated feeder (if available) for efficiency. Ensure garments are flat and wrinkle-free.
-
Automated Patch Placement: For large orders, use a robotic patch feeder to place PEPHAWK’s patches uniformly on each garment. For smaller batches, manually place patches before feeding.
-
Continuous Pressing: The garment moves through the heated rollers, which apply consistent heat and pressure. The machine’s sensors monitor temperature and speed to ensure uniformity.
-
Post-Press Cooling & QC: After exiting the rollers, garments pass through a cooling tunnel to set the adhesive. A quality control team inspects for adhesion, misalignment, or fabric damage—defective items are routed for rework.
4.3.3 Pros & Cons
-
Pros: Ultra-high efficiency (process 500–1000 garments per hour), consistent results for mass production, minimal labor required.
-
Cons: High investment cost (tens of thousands of dollars), limited to flat garments, not suitable for 3D or thick patches.
4.3.4 PEPHAWK’s Notes
-
For custom roller press settings, PEPHAWK’s technical team provides on-site support to calibrate machines for specific patch types.
-
Use a non-stick conveyor belt cover to prevent adhesive buildup—this reduces maintenance downtime.
-
For orders with mixed patch sizes, program the machine to adjust speed automatically based on patch dimensions.
5. Troubleshooting Common Issues with Heat Press Machines
Even with the right machine, issues can arise during application. Below are common problems, their causes, and solutions tailored to PEPHAWK’s iron-on patches:
5.1 Poor Adhesion (Patch Feels Loose)
-
Causes: Low temperature, insufficient pressure, short pressing time, damp fabric, or fabric with sizing/chemicals.
-
Solutions:
-
Increase temperature by 10–15°C (within PEPHAWK’s recommended range).
-
Boost pressure (e.g., from 4kg/cm² to 6kg/cm² for thick fabrics).
-
Extend pressing time by 2–3 seconds.
-
Pre-dry fabric in an oven (low heat) for 5 minutes to remove moisture.
-
Pre-wash garments to remove sizing or chemicals.
-
5.2 Patch Peeling After Washing
-
Causes: Overheating (damaged adhesive), uneven pressure, or using steam during application.
-
Solutions:
-
Reduce temperature by 10°C (PEPHAWK’s adhesive can degrade above 170°C).
-
Use a Teflon sheet to ensure even pressure.
-
Avoid steam—use dry heat only.
-
Re-press the patch for 5–8 seconds after washing (if peeling occurs).
-
5.3 Fabric Damage (Burns, Discoloration)
-
Causes: Excess temperature, direct heat contact, or incompatible fabric.
-
Solutions:
-
Lower temperature to PEPHAWK’s recommended level for the fabric type.
-
Always use a Teflon sheet or cotton cloth to protect the fabric.
-
Test on a fabric swatch before full application.
-
For delicate fabrics (e.g., polyester), use a mini press with a low-temperature setting.
-
5.4 Patch Misalignment
-
Causes: Lack of alignment tools, unstable garment placement, or manual error.
-
Solutions:
-
Use PEPHAWK’s adhesive alignment stickers or platen grid lines.
-
Secure garments with clips or a garment holder.
-
For bulk production, invest in automated alignment tools or templates.
-
6. Machine Selection Guide for PEPHAWK Iron-On Patch Users
Choosing the right machine depends on your production scale, fabric type, and patch size. Use this guide to match your needs with the ideal tool:
6.1 By Production Scale
-
DIY/Small Batches (≤50 units): Household iron (low cost) or mini heat press (better results).
-
Medium Batches (50–500 units): Clamshell heat press (balance of efficiency and cost).
-
Large-Scale Production (≥500 units): Swing-away press (for thick/3D patches) or roller press (for mass flat garments).
6.2 By Fabric Type
-
Lightweight (Cotton, Linen, Polyester Blends): Household iron, mini press, or clamshell press.
-
Thick (Denim, Canvas, Leather): Swing-away press (even pressure) or clamshell press (higher pressure setting).
-
Delicate (Silk, Wool, Thin Polyester): Mini press (low temperature) or clamshell press (with Teflon sheet and reduced heat).
6.3 By Patch Type
-
Standard Embroidered/Iron-On Patches: Any machine (per scale and fabric).
-
3D Iron-On Patches: Swing-away press (even pressure for foam layers) or mini press (small batches).
-
Large Patches (≥15cm): Clamshell press (16x20in platen) or roller press (mass production).


PEPHAWK is proud to highlight ourintegrated one-stop service—seamlessly combining professional design, R&D, and manufacturing capabilities to deliver cohesive, end-to-end solutions for our valued clients.
Our core product range covers a diverse selection of high-quality accessories and silicone-based items, including:
- Garment Accessories: Silicone Labels, Micro Fiber Labels, TPU Labels, Leather Labels
- Electronic & Lifestyle Gadgets: Silicone Mobile Phone Skins, Silicone MP3 Skins, Silicone Chaplets, Silicone Bracelets
Beyond our core offerings, we also connect clients with complementary products through our trusted affiliated companies, ensuring all your needs are met under one partnership.
What sets us apart is our specialized expertise in key manufacturing processes: Silk Screen Printing, High-Frequency Welding, Sublimation Printing, Seamless Fabric Processing, and Laser Cutting. These capabilities allow us to serve a wide array of industries—from garments, shoes, caps, and gloves to electronic devices, bags, and sporting equipment—with products that blend durability, functionality, and aesthetic appeal.
At PEPHAWK, customer satisfaction is our top priority. We’re committed to providing responsive, thorough support, andguarantee a same-day response to all inquiries—no exceptions. You can rely on us for consistent quality, reliable delivery, and a partnership that’s as efficient as it is trustworthy.
Whether you’re looking for custom apparel labels, protective silicone skins, or tailored manufacturing solutions, PEPHAWK has the expertise and flexibility to bring your vision to life.
Elevate Your Brand with Durable, Custom Embroidered Patches
Modern Team Patches: Essential Brand Assets for Apparel and Accessory Success




SEND MESSAGE