

Custom Made Embroidery Patches Turn Basic Garments Into Standout Pieces
2026-06-22
Table of Contents
- Creative Scenarios For Custom Made Embroidery Patches
- Embroidery Stitch Styles And Visual Effects
- Full Technical Specifications For Custom Orders
- Backing Solutions For Every Fabric And Use Case
- Industry Uses That Go Beyond Standard Uniforms
- Design Practices For Clean, Professional Results
- Application And Care Tips For Long Lasting Wear
- The Standard Custom Order Journey Step By Step
- Signs Of High Quality Custom Made Embroidery Patches
- Fun Upgrade Ideas For One Of A Kind Patches
Custom made embroidery patches sit among the most versatile and long-lasting branding details you can add to apparel, accessories, and gear.
You will find them stitched to denim jackets, fixed to tactical vests, centered on baseball caps, and sewn onto work uniforms, each one carrying a logo, a message, or a memory in tight, durable stitches. Unlike printed graphics that crack, peel, and fade with regular wear, embroidered patches hold their shape and color through hundreds of washes, outdoor exposure, and daily use. For brands, teams, and creative projects, they deliver a premium, tactile finish that feels intentional and well made, turning even the most basic garment into something with personality and recognition value.
Demand for custom stitched emblems continues to rise as more creators discover how flexible they can be. They work just as well for bulk uniform programs as they do for limited-edition streetwear drops, collector sets, and one-off DIY projects. Every detail from stitch style and base fabric to backing type and border finish can be adjusted to match different use cases, budgets, and aesthetic preferences. Knowing how each specification impacts the final product helps you place orders that perfectly match your vision and perform exactly how you need them to.
Creative Scenarios For Custom Made Embroidery Patches
Custom made embroidery patches work far beyond standard uniform logos, and their flexibility makes them a favorite tool for creative projects of all sizes.
Many brands and event organizers produce limited-run patches as collectible memorabilia. Tournament attendees, festival goers, and anniversary celebration guests take home patches as tangible souvenirs they can apply to bags, jackets, and hats long after the event ends. Unlike stickers or pins, embroidered patches hold up to daily use and keep the memory visible for years.
DIY fashion and upcycling communities also rely heavily on custom patches. A single well-placed embroidered emblem can refresh a thrifted jacket, cover a stain on a favorite shirt, or add personality to plain canvas totes. Many small creators sell curated patch sets so customers can mix and match designs to build fully personalized garments without advanced sewing skills.
Hobby groups and niche communities use patches to build belonging. Motorcycle clubs, hiking teams, tabletop gaming groups, and pet owner communities all create custom emblems for members to display. Shared patches create instant visual recognition and reinforce group identity, even when members meet in passing at events or on the road.
Even pet accessories benefit from custom embroidery. Small name patches sewn onto collars and harnesses add a polished touch while displaying contact information in a more durable format than printed tags. Decorative themed patches turn standard pet gear into fun, personalized accessories.
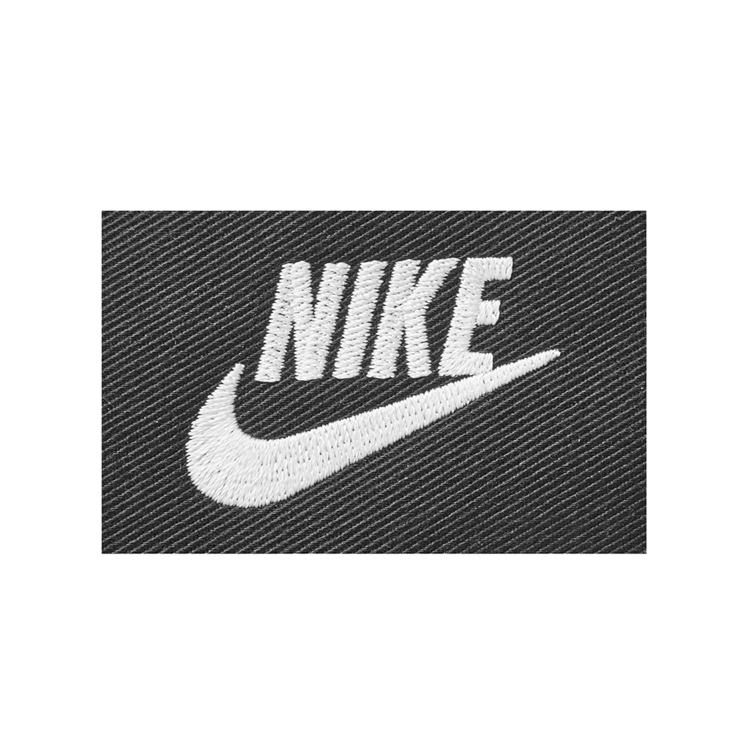
Embroidery Stitch Styles And Visual Effects
Different stitching techniques create very different looks and textures, and each style works best for specific types of designs.
Standard Flat Embroidery
Flat embroidery forms the foundation of most custom made embroidery patches. Threads lie smooth and tight against the base fabric, creating a clean, textured surface that reproduces logos, text, and detailed artwork with accuracy. This style supports up to 15 thread colors per design and handles fine details far better than puff or chenille styles. It works for nearly every use case, from corporate uniform patches to retail fashion accessories, and holds up exceptionally well through repeated washing and heavy wear.
3D Puff Embroidery
3D puff embroidery adds visible dimension by placing a thin foam layer under select stitched areas. The foam lifts stitches 2 to 3 millimeters off the patch surface, creating a bold, raised effect that catches light and draws attention. This style works best with thick block letters, bold shapes, and wide outlines. Thin lines, small text, and intricate details do not translate well with foam, as narrow areas cannot support the material structure. Puff embroidery appears most often on hat patches, streetwear pieces, and designs that need a standout, premium look.
Chenille Embroidery
Chenille embroidery produces a soft, fuzzy, carpet-like texture using looped yarn stitches. Most closely associated with vintage varsity jackets and letterman awards, this style carries a nostalgic, retro feel that feels luxurious and substantial. The yarn stands much taller than standard embroidery thread, giving patches a plush, tactile finish. Chenille works best for large, simple shapes and bold lettering, and it frequently pairs with flat embroidery for outlined designs that mix textures.
Comparison of Embroidery Styles
|
Style
|
Texture
|
Best For
|
Detail Level
|
Typical Cost
|
Durability
|
|
Flat Embroidery
|
Smooth, raised thread
|
Logos, text, complex artwork
|
High
|
Standard
|
Excellent
|
|
3D Puff Embroidery
|
Dimensional, raised foam
|
Bold letters, simple shapes
|
Low-Medium
|
Premium
|
Good
|
|
Chenille Embroidery
|
Soft, fuzzy, carpet-like
|
Varsity letters, retro designs
|
Low
|
Premium
|
Good
|
|
Mixed Technique
|
Multi-texture combination
|
Premium brand emblems
|
Medium
|
High
|
Excellent
|
Full Technical Specifications For Custom Orders
Every technical choice shapes the final look, feel, price, and performance of custom made embroidery patches. Clarifying these specifications before placing an order ensures results that align exactly with your expectations.
Size Reference By Placement
Patch dimensions range from 0.75 inches for tiny side-of-hat logos to more than 12 inches for full-back jacket emblems. Most general-use patches fall between 2.5 and 4 inches, a versatile size that works for chests, sleeves, shoulders, and standard hat fronts. Picking the right size depends on where the patch will sit and how much visual weight it should carry.
|
Placement
|
Typical Size
|
Common Shapes
|
Notes
|
|
Hat Front
|
2.0" – 2.5" tall
|
Circle, rectangle, arch
|
Must follow cap curve
|
|
Jacket Chest
|
2.5" – 3.5"
|
Circle, shield, square
|
Should not overpower buttons or zippers
|
|
Sleeve / Shoulder
|
3.0" – 4.0"
|
Circle, rectangle, shield
|
Allow for arm movement
|
|
Tactical Vest
|
2" x 3" standard
|
Rectangle
|
Matches standard velcro panels
|
|
Jacket Back
|
8" – 12" wide
|
Rectangle, rocker, custom
|
Consider weight at full coverage
|
|
Name Tape
|
1" x 5" typical
|
Long rectangle
|
Worn above pockets
|
Embroidery Coverage Levels
Embroidery coverage describes how much of the patch surface is covered by stitches instead of visible base fabric. This specification has a direct impact on both cost and appearance.
-
50% coverage: Roughly half the twill base remains visible. This option works well for text-heavy designs, simple logos, and budget-focused orders, with the exposed twill acting as the background color.
-
75% coverage: The most common standard option. Most of the surface holds stitches, with only small background areas showing twill. It balances detail, appearance, and price for most designs.
-
100% coverage: Stitches cover the entire surface with no base fabric visible. This creates a dense, premium finish associated with military, biker, and high-end retail patches. It carries a higher price due to increased stitch count and longer production time.
Base Fabric Materials
The base fabric forms the foundation of every patch and contributes to its durability, weight, and feel.
-
Twill: The standard base for most custom made embroidery patches. Poly-cotton twill is smooth, durable, and available in dozens of colors. It holds stitches securely and resists fraying when finished with a proper border.
-
Felt: A softer, thicker base material most often used for chenille patches and vintage-style designs. Felt comes in many colors but offers less durability than twill for heavy-wear applications.
-
Velvet: A premium base option that adds a soft, luxurious background. It appears primarily in high-end fashion patches and decorative specialty designs.
Thread Options
High-quality patches use polyester embroidery thread for its superior colorfastness, tensile strength, and resistance to UV fading. Polyester outperforms rayon for outdoor use and repeated washing, and standard production includes 8 to 15 thread colors per design at no extra cost. Pantone color matching ensures precise alignment with official brand colors. Metallic threads in gold, silver, and bronze are available as an upgrade for designs that need a shiny, eye-catching accent, and novelty threads like glow-in-the-dark and color-changing options add playful, unique touches.
Border Finishes
The border seals the raw edge of the patch to prevent fraying and gives the emblem its finished shape.
Merrowed borders use a classic overlocked stitch to create a raised, rounded thread edge. This is the traditional finish seen on military patches, scout badges, and most standard embroidered emblems. Merrowed borders work best on regular shapes such as circles, squares, and simple shields, and they deliver excellent durability and a clean, timeless look.
Laser-cut or hot-cut borders use precision cutting to create a flat, clean edge that follows the exact outline of custom shapes. This method supports irregular, die-cut forms that trace the contours of a logo or artwork. The edge is heat-sealed during cutting to stop fraying. Laser-cut borders deliver a modern, sleek finish and work perfectly for intricate custom shapes that would not work with a merrowed edge.
Backing Solutions For Every Fabric And Use Case
The backing material determines how custom made embroidery patches attach to garments and gear. The right choice depends on how permanent the attachment needs to be, who will apply the patches, and what type of fabric they will adhere to.
Iron-On Backing
Iron-on backing features a heat-activated adhesive film on the reverse side. When heated with a household iron or heat press, the adhesive melts and bonds the patch firmly to fabric. This is the most popular backing option because it requires no sewing skills and takes less than a minute to apply. Iron-on backing works best on cotton, denim, canvas, and other heat-resistant fabrics. It creates a semi-permanent bond that lasts through many wash cycles when applied correctly. For maximum longevity, many users add a line of edge stitching around iron-on patches for extra security.
Sew-On Backing
Sew-on backing is a plain fabric reverse with no adhesive. The patch must be stitched to the garment by hand or sewing machine. This is the most durable and permanent attachment method available. Sew-on patches will not peel or lift, even after years of heavy wear and repeated laundering. This backing is recommended for uniform programs, workwear, tactical gear, and any application where reliability is critical. Stitching along the border creates a clean, professional finish and allows the patch to be removed later without damaging the garment if needed.
Velcro Backing
Velcro backing uses hook and loop fastener to make patches fully removable and interchangeable. The hook side attaches to the patch, and the loop side sews onto the garment or gear. This system is standard for tactical gear, police uniforms, military morale patches, and backpacks where users want to swap patches frequently. Velcro patches are popular among collectors and anyone who likes to customize their gear on a regular basis. The hook and loop material adds thickness to the patch and typically costs more than standard backing options.
Peel-and-Stick Adhesive Backing
Peel-and-stick backing features a pressure-sensitive adhesive covered by a protective paper liner. Users peel off the liner and press the patch into place for temporary application. This backing works well for events, promotions, and one-time use. It is not intended for long-term wear or washing, as the adhesive will weaken over time. Peel-and-stick patches work great for conference badges, temporary team events, and promotional giveaways where convenience matters more than permanence.
Backing Type Comparison
|
Backing Type
|
Application Speed
|
Permanence
|
Skill Required
|
Best Fabric Types
|
Typical Use Case
|
|
Iron-On
|
Fast
|
Semi-permanent
|
None
|
Cotton, denim, canvas
|
General branding, retail
|
|
Sew-On
|
Slow
|
Permanent
|
Basic sewing
|
All fabric types
|
Uniforms, workwear, tactical
|
|
Velcro
|
Instant
|
Removable
|
Sewing for loop side
|
All fabric types
|
Tactical gear, morale patches
|
|
Peel-and-Stick
|
Instant
|
Temporary
|
None
|
Smooth clean surfaces
|
Events, promotions, one-time
|
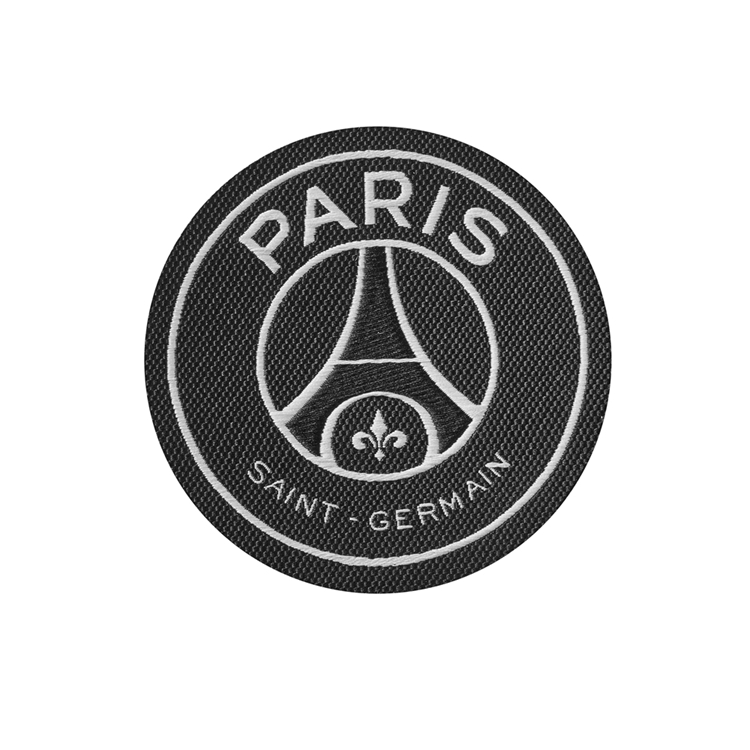
Industry Uses That Go Beyond Standard Uniforms
Custom made embroidery patches serve a remarkably wide range of industries, with each field finding unique ways to leverage their durability and visual appeal.
Corporate and workplace teams use embroidered patches on uniforms, work jackets, safety vests, and company swag. Patches create a consistent, professional look across teams and departments while keeping branding uniform. Unlike direct garment embroidery, patches can be applied evenly across large batches and replaced if a logo updates without discarding the entire garment, making them a cost-effective choice for companies with high turnover or periodic rebranding.
Sports organizations at every level from youth leagues to professional franchises rely on embroidered patches for jerseys, jackets, bags, and caps. Team logos, player numbers, championship commemoratives, and sponsor marks all translate well to embroidery. Patches withstand the rigors of athletic use, frequent washing, and outdoor exposure better than printed alternatives. Many programs build patch collections from tournaments and events to display on letter jackets as a visible record of achievement.
Military, law enforcement, and public safety agencies depend on custom embroidered patches for official identification. Rank insignia, unit emblems, department badges, and morale patches all use embroidery for its authoritative appearance and long service life. These patches must meet strict standards for color accuracy, size consistency, and durability to hold up through daily duty wear and regular laundering. Many departments use velcro-backed patches so officers can adapt their uniform configuration quickly for different assignments.
Schools, scouting programs, and youth organizations use custom patches for uniforms, achievement awards, and membership identification. Embroidered patches carry a long tradition in scouting and academic programs as tangible symbols of accomplishment. Young members enjoy collecting and displaying patches on vests, sashes, and backpacks. The durable nature of embroidery means patches stay looking good through years of active use as kids grow and participate in more activities.
Fashion and streetwear brands use custom embroidery patches to add decorative elements to jackets, jeans, hats, and bags. Patches allow brands to offer customizable products and limited-edition designs without committing to large production runs of fully printed or embroidered garments. The tactile, premium feel of embroidery elevates basic pieces and increases perceived value. Many streetwear brands release patch collections as standalone accessories that customers can apply to their own clothing.
Design Practices For Clean, Professional Results
Great-looking patches start with thoughtful design choices that work with the strengths of embroidery instead of against them. A few simple guidelines will help you create designs that stitch cleanly and look polished.
Simplify fine details before finalizing your artwork. Embroidery thread has physical thickness, so extremely thin lines and very small text will not stitch clearly. As a general rule, text should be at least 0.25 inches tall to remain readable, and lines thinner than 0.05 inches may disappear or look jagged once stitched. If your logo includes very small details, either simplify them or increase the overall patch size to give the stitches room to form properly. An experienced digitizer can help identify what will work and what may need adjustment.
Use color strategically for maximum impact. While many providers offer up to 15 thread colors at no extra cost, designs with fewer colors often look cleaner and read better from a distance. Bold, high-contrast color combinations give your patch stronger visual presence and make logos more recognizable. Gradients and photorealistic effects do not translate well to embroidery and should be avoided. Solid color blocks and clear outlines produce the sharpest, most professional results.
Match your shape to the right border style. The shape of your patch affects both cost and production time. Standard shapes like circles, rectangles, and shields are faster to produce and usually cost less than complex custom die-cut shapes. If your design follows an irregular outline, a laser-cut border will give you the cleanest edge. For traditional shapes, a merrowed border delivers that classic embroidered patch look at a lower cost.
Plan embroidery coverage to fit your budget. Full 100% embroidery coverage looks impressive but costs significantly more than partial coverage designs. If your design naturally includes a solid background color, consider using the twill base as that background color and saving stitches for the foreground elements. This approach reduces cost without sacrificing visual quality. Your patch supplier can recommend the optimal coverage level for your specific design.
Application And Care Tips For Long Lasting Wear
Proper application and routine care keep custom made embroidery patches looking sharp and well adhered for as long as possible. Following a few basic guidelines will maximize patch lifespan and keep branded garments looking professional.
Successful iron-on application requires enough heat, steady pressure, and full cooling time. Start with a clean, dry garment free of fabric softener residue, which can reduce adhesive grip. Set your iron to the cotton setting and turn off all steam functions. Position the patch exactly where you want it, then cover it with a thin cotton pressing cloth to protect the threads from direct heat. Press firmly with the iron for 25 to 35 seconds, applying steady downward pressure instead of sliding the iron back and forth. Turn the garment inside out and press from the reverse side for an additional 15 seconds to ensure full adhesive activation. Allow the patch to cool completely before touching or moving the garment, as the adhesive sets as it cools.
For maximum permanence, sew patches along the border edge. A sewing machine with a zig-zag stitch produces the most professional result, but hand sewing with a whip stitch also works well. Use thread that matches the border color for an invisible finish, or clear nylon thread if an exact color match is not available. For thick fabrics like leather and heavy denim, use a heavy-duty needle to avoid bending or breakage. Before sewing, pin the patch in place or use a small amount of fabric glue stick to hold it temporarily while you stitch.
Garments with embroidered patches should be washed inside out on a gentle cycle using cold water. Cold temperatures prevent adhesive softening on iron-on patches and keep thread colors vibrant. Use mild detergent and avoid bleach products, which can fade and weaken embroidery thread. Air drying is the safest method, but if you use a dryer select the lowest heat setting. High heat can degrade iron-on adhesive and cause edges to lift over time. Avoid dry cleaning, as cleaning solvents can damage both adhesive and thread materials. If you notice slight edge lifting after months of wear, simply re-press with an iron and protective cloth to refresh the bond.
The Standard Custom Order Journey Step By Step
Ordering custom made embroidery patches follows a predictable process when working with an experienced supplier, moving from initial concept to finished delivery in clear stages.
First, you submit your design file along with your full specifications including quantity, size, backing type, and border preference. Vector files such as AI, EPS, or PDF produce the most accurate results, but high-quality JPG and PNG files also work for most designs. The supplier reviews your artwork and provides a digital proof showing how the design will translate to an embroidered patch. This is the stage to request any adjustments to size, colors, or detail interpretation before production begins.
Once you approve the digital proof, the design goes through the digitizing process, where a specialist converts the artwork into a stitch file that embroidery machines can read and execute. Digitizing is a skilled craft that directly impacts final quality, stitch count, and production efficiency. After digitizing, a physical sample may be produced for approval before full production begins, depending on order size and supplier policy.
Production time varies based on order quantity and complexity. Standard orders typically ship within seven to fourteen business days, with rush production options available for urgent deadlines. After stitching is complete, patches go through quality inspection for color accuracy, stitch consistency, border neatness, and backing adhesion. Finished patches are then packaged and shipped directly to your location.
Signs Of High Quality Custom Made Embroidery Patches
Prices for custom made embroidery patches can vary widely between suppliers, and the difference in quality becomes visible after just a few months of regular use. A few key markers separate well-made patches from lower-priced alternatives.
Quality patches use high-grade polyester thread that resists UV fading and maintains color vibrancy for years. Lower-grade alternatives dull, fray, and break down much faster, especially with outdoor use. Premium patches also have consistent stitch density that creates a uniform surface without gaps, puckering, or loose threads. The backing adhesive on quality iron-on patches forms a strong, reliable bond that does not peel after the first wash.
Digitizing quality also differs tremendously between suppliers. Experienced digitizers know how to compensate for thread pull, adjust stitch direction for stability, and interpret complex designs so they stitch cleanly and stay true to the original artwork. Poor digitizing results in patch designs that look distorted, misaligned, or rough around the edges. Working with a supplier that employs skilled, in-house digitizers ensures your brand logo looks its best when stitched.
Reliable suppliers also stand behind their products with clear policies and responsive customer service. They catch errors before production, communicate clearly throughout the process, and resolve any issues promptly. For businesses placing regular orders, building a relationship with a trusted patch supplier saves time, reduces hassle, and ensures consistent quality across every order.
Fun Upgrade Ideas For One Of A Kind Patches
Beyond standard options, several creative upgrades can turn basic custom made embroidery patches into memorable, shareable products that stand out from generic emblems.
Glow-in-the-dark thread absorbs light during the day and glows softly in dark environments. It works perfectly for outdoor brand patches, Halloween designs, safety gear, and novelty items, adding a playful, unexpected element that people enjoy showing off.
Color-changing thread shifts hue with temperature changes, creating an interactive effect that surprises anyone who touches it. This novelty option works well for promotional items, limited-edition streetwear drops, and creative brand campaigns that encourage social sharing.
Mixed-technique patches combine two or more stitch styles in a single design. For example, a brand logo might use flat embroidery for fine details and 3D puff for the main lettering, creating depth and visual interest. Combining chenille with flat embroidery is another popular combination for retro-inspired designs.
Shape-following laser-cut patches ditch standard geometric borders to trace the exact outline of your artwork. Animal silhouettes, plant shapes, product outlines, and custom letterforms all work as unique patch shapes that feel much more distinctive than basic circles or rectangles.
Collector sets bundle multiple small patches into a themed pack. Brands release seasonal sets, event collections, and character series that encourage repeat purchases and build community around patch trading and display.
Custom made embroidery patches offer an unbeatable combination of durability, premium appearance, and creative flexibility for branding, merchandising, and personalization projects. Whether you are outfitting an entire team with uniform patches, creating promotional merchandise for a marketing campaign, or designing retail-ready decorative patches for sale, embroidery delivers a tactile, high-quality result that elevates any garment or accessory. Understanding the different stitch styles, technical specifications, backing options, and design best practices helps you make informed decisions and get the maximum value from every order.
When selecting a supplier, prioritize quality materials, skilled digitizing, and reliable service over the lowest price point. A well-made embroidered patch represents your brand every time someone sees it, and that visibility makes it worth producing correctly. With thoughtful design choices and proper care, your custom embroidered patches will continue looking sharp and professional for years of regular wear and washing.
Make Your Brand Stand Out With Patches Iron On Custom Designs
Stick On Patches For Leather That Work Like A Charm




SEND MESSAGE