

Screen Printing Logos Unveiled: What It Is & How It Brings Your Brand to Life
Screen printing, also known as silk screening, is a versatile and widely used printing technique, especially popular in garment logo customization.
It is favored by brands of all sizes for its ability to produce high-quality, durable logos on a variety of apparel items. Whether it’s a small business’s brand logo on a t-shirt or a large corporation’s emblem on a hoodie, screen printing delivers consistent, vibrant results that stand the test of time.
This article will break down the fundamentals of screen printing, focusing on its application in garment logo creation. It will explain what screen printing is, how it differs from other printing methods, walk through its step-by-step process, and highlight key tools, advantages, and considerations to achieve perfect logo results.
I. What is Screen Printing?
At its core, screen printing is a stencil-based printing method that transfers ink onto a substrate (in this case, garments) through a mesh screen. The stencil blocks ink from passing through certain areas, while allowing it to pass through others to form the desired design—most commonly, a brand logo.
With roots dating back to ancient China and Japan, screen printing has evolved significantly over the centuries. What was once a manual, labor-intensive process has now integrated modern technology, making it more efficient and precise, especially for large-scale logo production.
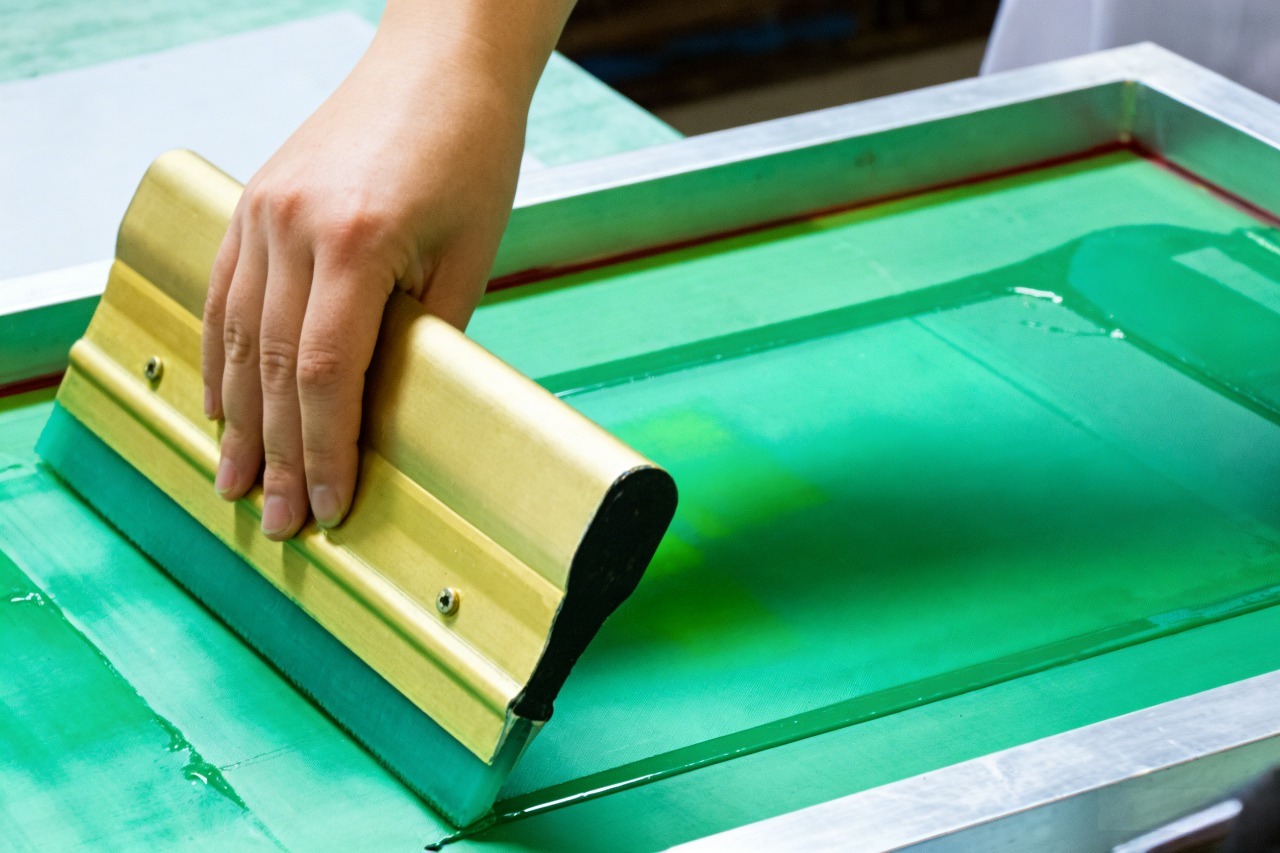
The key principle of screen printing for logos is simplicity: create a stencil of the logo, mount it on a mesh screen, apply ink over the screen, and use a squeegee to push the ink through the stencil onto the garment. This process ensures that the logo is bold, opaque, and adheres well to the fabric.
1.1 Screen Printing vs. Other Garment Logo Printing Methods
There are several methods for printing logos on garments, but screen printing stands out for its durability and cost-effectiveness in bulk orders. The table below compares screen printing with three common alternatives:
| Printing Method | Key Advantages for Logos | Key Disadvantages for Logos | Best For |
|---|---|---|---|
| Screen Printing | Durable, vibrant colors, cost-effective for bulk, works on most fabrics | High setup cost for small orders, less ideal for complex gradients | Bulk orders (t-shirts, hoodies), bold, simple logos |
| DTG (Direct-to-Garment) | Ideal for complex designs/gradients, low setup cost for small orders | Less durable, expensive for bulk, poor coverage on dark fabrics | Small orders, detailed, multi-color logos |
| Heat Transfer | Quick setup, low cost for small orders, works on many fabrics | Prone to peeling/fading, less breathable, not ideal for large logos | Small batches, temporary or promotional logos |
| Embroidery | Professional look, very durable, 3D texture | Expensive for large logos, less vibrant colors, not ideal for fine details | Formal apparel (jackets, polos), small, simple logos |
For most brands looking to produce high-quality, long-lasting logos in bulk, screen printing is the most reliable choice. It balances quality, durability, and cost in a way that other methods cannot match.
1.2 Common Applications of Screen-Printed Logos
Screen printing is highly versatile and works with a wide range of garment types and fabrics. Some of the most common applications include:
II. How Does Screen Printing for Garment Logos Work? (Step-by-Step)
Screen printing for logos involves four main stages: pre-printing preparation, printing setup, core printing, and post-printing curing. Each stage is critical to ensuring the logo is precise, vibrant, and durable. Below is a detailed breakdown of each step.
2.1 Pre-Printing Preparation (Critical for Logo Precision)
Pre-printing preparation is the foundation of a high-quality screen-printed logo. Rushing this stage can lead to misaligned, blurry, or flawed logos. The key steps are as follows:
Step 1: Logo Design Finalization & Optimization – First, the logo design must be finalized and optimized for screen printing. Unlike digital designs, screen printing works best with simple, bold designs. Fine details (such as small text or thin lines) should be simplified, as they can be difficult to reproduce with ink. The design should also be sized correctly for the garment (e.g., a chest logo for a t-shirt is typically 3-4 inches wide).
Step 2: Film Positive Creation – Next, a film positive is created. This is a transparent film with the logo design printed in black (or another opaque color). The film positive acts as a stencil for the screen, blocking light during the exposure process. Film positives can be created digitally (using a printer) or analogically (using traditional methods).
Step 3: Screen Mesh Selection – The screen mesh is a fine fabric (usually made of polyester or nylon) stretched over a frame. The mesh count (number of threads per inch) determines the detail and ink coverage of the logo. For most garment logos, a mesh count of 110-156 is ideal: lower counts (110) are best for bold logos with thick ink, while higher counts (156) work for logos with finer details.
Step 4: Screen Coating & Drying – The screen is coated with a photosensitive emulsion. This emulsion is a light-sensitive liquid that hardens when exposed to UV light. The screen is coated evenly on both sides and then left to dry in a dark, dust-free area. Drying time typically takes 30-60 minutes, depending on the temperature and humidity.
Step 5: Screen Exposure – Once the emulsion is dry, the film positive is placed on top of the screen, and the screen is exposed to UV light. The light hardens the emulsion where the film positive is not (i.e., the areas where ink should not pass through). The areas covered by the logo on the film positive remain unexposed and soft.
Step 6: Screen Development – After exposure, the screen is rinsed with water. The unexposed (soft) emulsion is washed away, leaving a stencil of the logo on the screen. This stencil is the pattern through which ink will pass onto the garment.
Step 7: Screen Inspection & Touch-Up – Finally, the screen is inspected for flaws (such as holes in the stencil or unwashed emulsion). Any imperfections are touched up (e.g., using tape to block small holes) to ensure the logo is flawless.
2.2 Printing Setup (Garment-Specific Calibration)
Once the screen is prepared, the printing setup begins. This stage ensures that the ink is the correct color, the screen is aligned properly, and the garment is secured to avoid misalignment.
| Setup Step | Details & Importance for Logos |
|---|---|
| Ink Preparation | Ink is mixed to match the brand’s Pantone color (critical for brand consistency). For dark fabrics, a white underbase ink may be needed to make the logo colors pop. |
| Screen Mounting | The prepared screen is mounted on a printing press (manual or automatic). The press holds the screen in place and allows for precise control during printing. |
| Garment Fixturing | The garment is placed on a platen (flat surface) and secured with clamps or tape. This prevents the garment from moving during printing, which would cause misaligned logos. |
| Screen Alignment | The screen is aligned so that the stencil is positioned exactly where the logo should appear on the garment. For multi-color logos, multiple screens (one per color) are aligned to ensure colors overlap correctly. |
2.3 The Core Printing Process
With the setup complete, the actual printing begins. This is the most straightforward stage, but precision is still key to achieving a clean, consistent logo.
Step 1: Ink Application – A small amount of ink is poured onto the top of the screen, above the stencil.
Step 2: Squeegee Motion – A squeegee (a flat, rubber blade) is pulled firmly across the screen, from top to bottom. The squeegee pushes the ink through the stencil onto the garment, creating the logo. The pressure of the squeegee must be even to ensure consistent ink coverage.
Step 3: Multi-Color Printing (If Needed) – For multi-color logos, the process is repeated with each color screen. Each color is printed sequentially, and the garment may be flash-dried (briefly heated) between colors to prevent ink bleeding.
Step 4: Initial Inspection – After printing, the garment is checked for ink coverage, position, and color accuracy. Any smudges or misalignments are corrected immediately.
2.4 Post-Printing Curing & Finishing
Curing is the final and most critical step for logo durability. Uncured ink will peel, fade, or wash away easily. The steps are:
Step 1: Immediate Drying – For light inks or single-color logos, the garment may be air-dried briefly. For layered or dark inks, flash curing (using a heat lamp) is used to set the ink temporarily.
Step 2: Main Curing – The garment is then passed through a conveyor dryer or placed under a heat press. The temperature and time depend on the ink type (typically 320-350°F for 60-90 seconds). This heat polymerizes the ink, bonding it permanently to the fabric.
Step 3: Cooling & Setting – After curing, the garment is allowed to cool completely. This helps the ink set firmly and prevents smudging.
Step 4: Final Quality Inspection – The final inspection checks for adhesion (using a tape test), color accuracy, logo placement, and any smudges or flaws. Only garments that meet quality standards are approved for delivery.
III. Key Tools & Materials for Screen-Printed Logos
To produce high-quality screen-printed logos, you need the right tools and materials. The table below lists the essentials and their uses:
| Category | Tools/Materials | Purpose for Logo Printing |
|---|---|---|
| Screen Tools | Screen frames, mesh, emulsion, exposure unit | Create the stencil of the logo |
| Printing Tools | Squeegee, printing press, platen | Transfer ink through the stencil onto the garment |
| Ink & Color Materials | Garment ink, Pantone color mixers, white underbase | Achieve the correct brand color for the logo |
| Curing Tools | Conveyor dryer, heat press, flash cure unit | Bond ink permanently to the fabric for durability |
| Auxiliary Tools | Tape, alignment tools, inspection lights | Ensure precision and fix small flaws in the stencil/logo |
IV. Key Advantages of Screen Printing for Garment Logos
Screen printing remains the top choice for garment logo customization for several key reasons:
1. Superior Durability – Screen-printed logos are highly resistant to washing, friction, and wear. When properly cured, the ink becomes part of the fabric, not just a layer on top, so it won’t peel or fade easily—even after dozens of washes.
2. Vibrant, Opaque Colors – Screen printing ink is thick and opaque, providing excellent coverage on dark fabrics (such as black or navy t-shirts). This ensures that the logo stands out and maintains its vibrancy over time.
3. Cost-Effectiveness for Bulk Orders – While the setup cost for screen printing is higher than other methods, the cost per garment decreases significantly for large orders. This makes it ideal for brands looking to print logos on hundreds or thousands of garments (e.g., employee uniforms, promotional items).
4. Versatility – Screen printing works with most garment fabrics, including cotton, polyester, blends, linen, and canvas. It also supports a variety of ink types, such as fluorescent, metallic, glitter, and water-based inks, allowing brands to create unique, eye-catching logos.
V. Important Considerations for Perfect Screen-Printed Logos
To avoid common mistakes and achieve perfect logos, keep these considerations in mind:
1. Design Constraints – Avoid overly complex designs with fine details or gradients. Screen printing works best with bold, simple logos. If your logo has small text, ensure it is at least 12pt in size to avoid blurriness.
2. Ink Selection – Choose ink based on the fabric type. For example, water-based inks work well on cotton, while plastisol inks are better for polyester blends. Also, match the ink to the brand’s Pantone color for consistency.
3. Curing Temperature & Time – Follow the ink manufacturer’s guidelines for curing temperature and time. Under-curing will lead to peeling, while over-curing can damage the fabric or fade the ink.
4. Registration for Multi-Color Logos – For multi-color logos, ensure each screen is aligned precisely. Even a small misalignment can ruin the logo’s appearance. Use alignment tools to ensure accuracy.
VI. Conclusion
Screen printing is a reliable, versatile, and cost-effective method for printing high-quality logos on garments. Its stencil-based process ensures bold, durable results that are perfect for brand customization, whether for small businesses or large corporations.
By following the step-by-step process—from pre-printing preparation to post-printing curing—and considering key factors like design, ink selection, and alignment, you can achieve consistent, professional screen-printed logos that represent your brand well.
Whether you’re printing logos for t-shirts, hoodies, or other apparel, screen printing remains a top choice for its durability, vibrancy, and scalability. It’s a timeless technique that continues to adapt to modern brand needs, making it an essential tool for garment customization.


PEPHAWK is proud to highlight our integrated one-stop service—seamlessly combining professional design, R&D, and manufacturing capabilities to deliver cohesive, end-to-end solutions for our valued clients.
Our core product range covers a diverse selection of high-quality accessories and silicone-based items, including:
- Garment Accessories: Silicone Labels, Micro Fiber Labels, TPU Labels, Leather Labels
- Electronic & Lifestyle Gadgets: Silicone Mobile Phone Skins, Silicone MP3 Skins, Silicone Chaplets, Silicone Bracelets
Whether you’re looking for custom apparel labels, protective silicone skins, or tailored manufacturing solutions, PEPHAWK has the expertise and flexibility to bring your vision to life.
Silicone Heat Transfer Labels: All You Need to Know
Apparel Security Labels: Your Brand’s Secret Weapon Against Fakes



